Thursday, December 12, 2013

Lentils, The Other Other Other Protein

Do me a favor.  Picture lentils in your mind's eye.

Let me guess: you've got an image of bland, grey-green little disks that sometimes make it into soups, usually along mushy, overcooked root veggies.

At least, that was my experience of lentils up until the last few years.  Sort of a tasteless not-quite-a-pea.  Turns out what I knew were French lentils.  I was missing out on an entire rainbow of other flavors and colors.  It wasn't until a night about two years ago when a friend of ours brought yellow lentils for an impromptu potluck that I found out how wrong I'd been.  Over dinner she and Doc got chatting about how they grew up eating lentils frequently as kids.  Their conversation about all these new choices captivated me.  I felt like I'd been given a "get out of eating chicken everyday free" card.  I was so excited I looked up a recipe for masoor dal (red lentils) the very next day.

These days between lentils and beans we've got probably around close to twenty choices in our house for legume-based meals.  The one I'm sharing today is my go-to, the most basic lentil recipe that I fall back on when I want to throw together a no-brainer vegetarian dinner.  The beauty of this dish is that it's astoundingly forgiving.  I rarely measure the spices.  I frequently throw extra veggies in just to see what will happen.  Each time it comes out a little different, and I think that's a big part of the reason we have it nearly once a week.  My favorite combo with this particular base recipe is a generous handful of  spinach and some sautéed mushrooms.

If you're googling other recipes for lentils, try looking for "dal."  That should really help bring back a lot of results.

Scroll to the bottom for the busy cook's version of the recipe, as usual.


Basic Spiced Lentils

Total Real Time:  An hour, plus or minus around 20 minutes so long as you make the tempering at the same time as the lentils are cooking.  Otherwise add 20-30 minutes to make the onion+spice mix.

Weirdest Spice:  mustard seeds.

As I mentioned above, we have a lot of choices:
Less than 1/3 of our collection.

I like a combo that I call "Halloween dal."

Not just for major holidays.

What you see there are, by name, masoor dal (red lentils) and urad dal (black gram lentils).

Aside:  In case you're wondering at this point what the heck the difference between a lentil and a bean is, let me tell you that Doc and I have already had a fight about it.  I had asked him to clarify the word "dal" for me, but he insisted that lentils and beans are the same.  Google says the difference is the shape.  So I'm going with Google on this one.  To me they are on a continuum based on both size and shape.  I can absolutely identify the legumes to the left (below) as red lentils.  To the far right are garbanzo beans/chickpeas.  In between are val dal (in English given the hilariously silly name lablab beans) and channa dal (supposedly also chickpeas according to every source I can find, but we all know that's baloney because the thing to the right of that are the real chickpeas). The lablab beans are lentil-shaped but bean-sized.  The channa dal are nearly as small as lentils but bean-shaped. So I dunno.  Whatever, I give up.

From left to right: red lentils, lablab beans, lies, & chickpeas.

Getting back to the recipe, I took half a cup each of red and black gram lentils and rinsed them very, very well under hot water.  With dried beans it's best to soak them for a day or so to help them loosen up and get less gassy (true story), but for lentils they're so small you can just cook 'em all in one go.  So maybe that's the difference.

Clean at last!

What we're going for here is to cook these to death.  Really, they're going to turn into tasty, tasty protein mush.  In order to do that it's important to get the ratio of liquid:lentils right.  3:1 works well in my experience, though I keep an eye and add more liquid as needed.  Too much and you're going to have a soggy mess, too little and it's not going to cook.  You can use water if you like.  I used some leftover vegetable stock I need to use up.  Whatever you do, resist the temptation to add salt.  Salt will work against you here and make any kind of dried bean/lentil take much longer to cook.  Even the sodium in the stock I used probably added cooking time.  I've seen a lot of recipes add tomatoes, garlic, or turmeric at this point.  The acid in the tomatoes will also increase your cook time, though, and I find that if I add anything at this point I have a harder time getting the flavors to mesh with the add-ins later.

Set and not-quite-forget: stir every 5-10 to prevent burning/sticking.

Get that bad boy boiling, then turn it down to a simmer and cover it.  How long the lentils take to break down depends on a number of factors, including size and age of the legume and how much salt/acid are in your liquid.  I find an hour, give or take, is about the time it takes to get them mushy.

After 45 minutes.  Close, but not quite there yet.

About 40 minutes into the lentils cooking I start the "tempering," or flavoring that's going to go into the lentils.  This is, in essence, onions+tomatoes+spices, or in other words pretty much every other curry base ever.

In a skillet, add about 2 tsp - 1 Tbs of your Oil of Choice.  I used ghee (clarified butter) here.
Not exactly butter, not exactly oil.  Definitely made of fat, though, that much is clear.

Aside:  It took me a while to adjust to ghee.  It's got a... pungent smell.  It will also help you yourself to smell more pungent.  So, y'know, use with caution.  Part of what freaked me out about it is that the English name "clarified butter" didn't totally sink in.  I couldn't figure out why in my fridge it was solid but in the pan it liquified.  The stuff made me uneasy until it all clicked.  Just chalk that one up to the blonde hair, eh?

This was a freshly-opened jar.  Usually I have to chip it out with a butter knife.

Anyway, once it melts and start to shimmer, it's time to add mustard seeds and cumin seeds & let them heat up for a few seconds:

Note: these are neither cumin powder or mustard powder.

Yet Another Aside:  Just as we discussed earlier how cumin seeds are not cumin powder, mustard seeds are not mustard powder.  They are not interchangeable here.  If you don't have these, leave them out rather than substituting at this stage.  You can sub in cumin powder later when the coriander powder goes in, if you want, but leave mustard powder out of this.

To the left: mustard powder & its byproducts.  To the right: mustard seeds.  Note the color difference.

Okay, so once your seeds are heated up -- less than a minute on medium-high should do it before you hear them begin to sizzle -- add about 1-2 finely minced onions.  For 1 cup of lentils + 3 cups of liquid, two onions was about right, keeping in mind that I freeze about 3/4 of just about everything I make.  Adjust for yourself accordingly.


I sautéed the onions on medium-high heat, stirring occasionally, for about 5 minutes.  In the mean time I chopped up a green chili.

Pleeeeeeeease note the gloves.

Tip for All Ability Levels:  Let me tell you a quick story.   Once upon a time I thought I didn't need to use gloves when cutting mild peppers (excluding bell peppers).  I figured hey, it's mild, it's not one of those blister-your-face peppers, so what's the danger in using my bare hands?  And then one day I seeded and chopped up some very mild green chilis and spent the next seven agonizing hours thinking my hands had actually caught fire.  Next to the time the novocaine wore off when I was getting my wisdom teeth out, this was one of the single most excruciating things I have ever experienced.  Not heavy-duty painkillers, not antihistamines, not tears nor five hours with my hands in a bucket of ice water could tame it.  Every time I'd dip my hands into the ice water I honestly expected them to make a sizzling noise.  So please, for all our sakes, even if you think it's "only" a mild pepper, grab some disposable gloves.  I use nitrile gloves from the hardware store.  They're cheap, and the relief it'll buy you is so, so worth it.  Just be careful when taking them off, it does no good to get all the oil from the peppers on your gloves and then touch the outside of the glove with your bare fingers.

Then again, if you don't like spicy food then it's a moo point.  Just leave the chili peppers out.

So now you've got your onions, seeds, and minced chili pepper.  Go ahead an add in a teaspoon each of our old friends, ginger and garlic pastes.  (Aren't you super glad you have a bunch on hand?)

Seriously, is there anything that these don't go in?

Stir that all up together and let it cook, stirring occasionally, for another 5 minutes or so.  Next up is adding spices.  First half a teaspoon of turmeric.
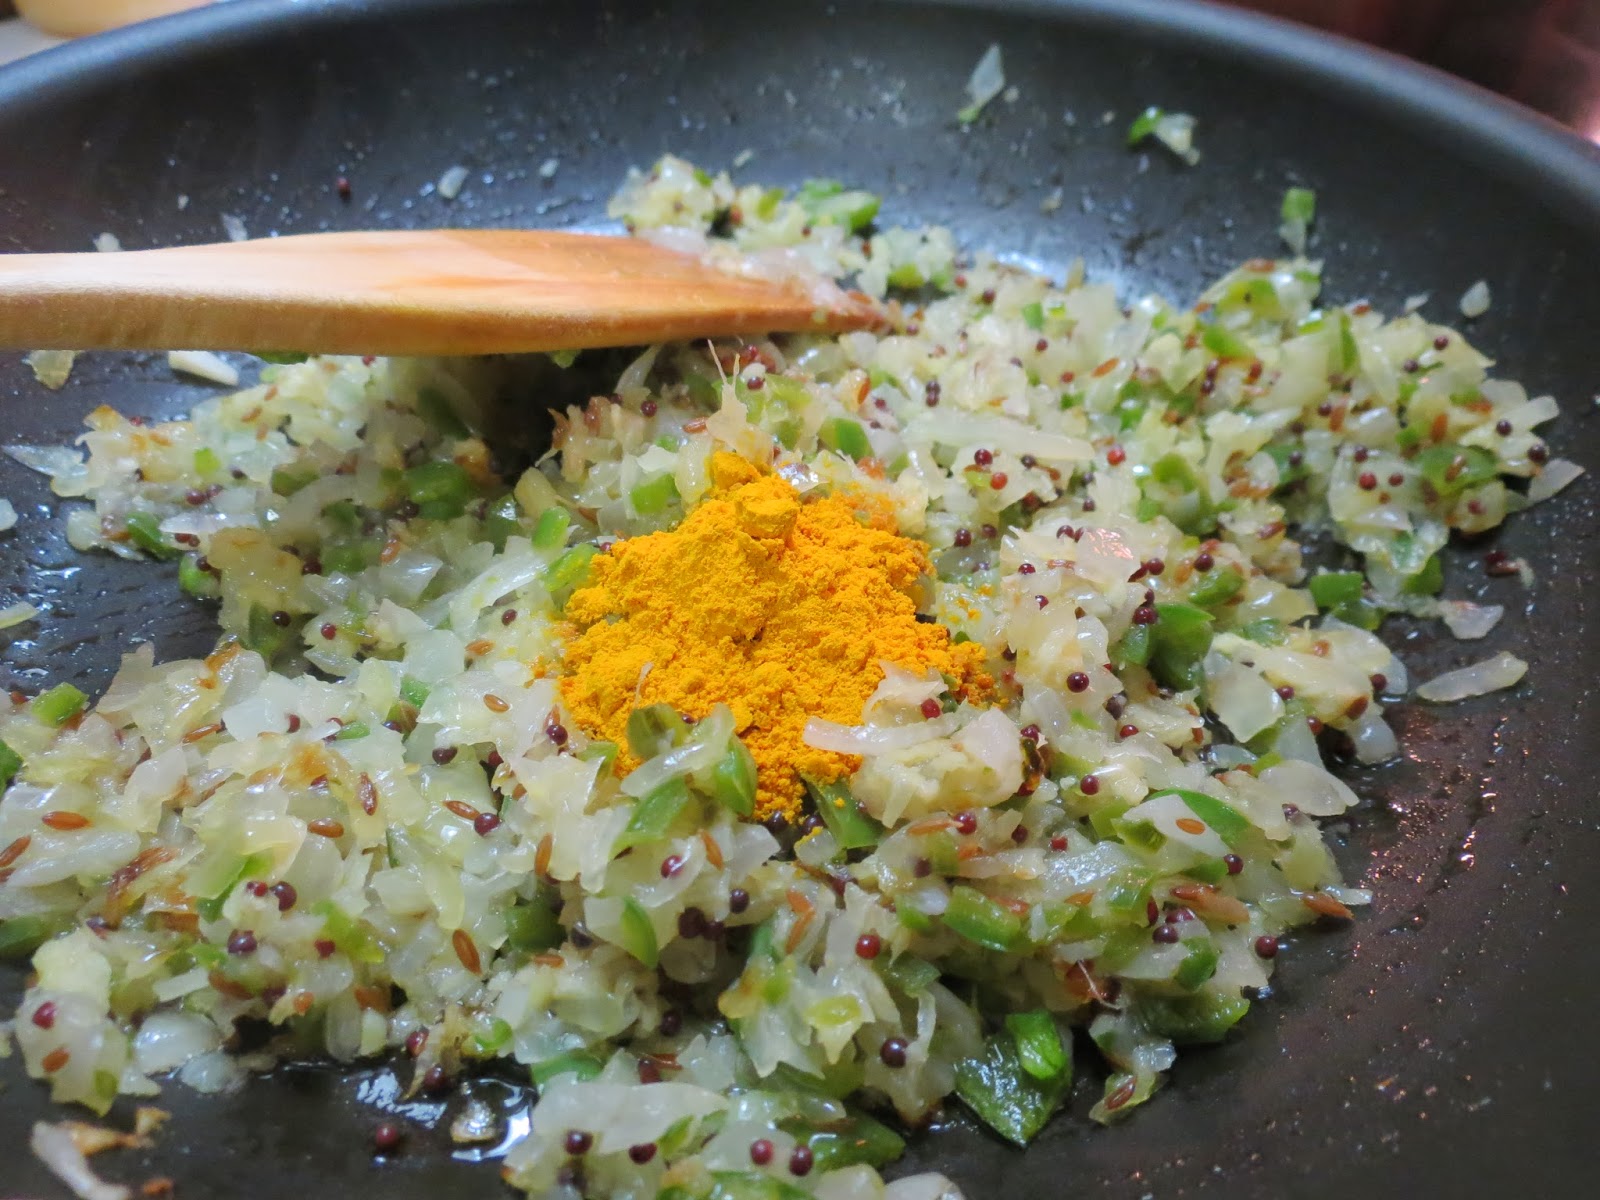
Careful, this stuff stains every single thing it touches.  You, your spoon, your counter, your tupperware...

Then chili powder, to taste.  I added about a teaspoon, maybe a little more.

I love it when my sinuses are on fire.

And finally about 1.5 -2 teaspoons of coriander powder.

Plus cumin here, if you skipped the cumin seeds.

Alright, so now you've got something that's getting closer and closer to a paste by the minute.  Give the spices about 1-2 minutes to cook, adding a tiny splash of water if the paste is too dry.  That'll help keep the spices from burning.

I didn't add any water here, but if it were any drier I would have.

Next up, add about 2-3 diced tomatoes.  We're not going for a sauce here so much as a flavoring, so go lighter on tomatoes than you would if you were making a curry base.


Mix that all up and let it simmer together for about another 10 minutes.  You can add in some hing if you like it, but let me tell you that the English word for hing is asafetida, which pretty much captures my feelings about the flavor of it.  (Go ahead, say asafetida out loud, with particular emphasis on the first, third, and fourth syllables.)  I haven't been able to grab a pinch that is small enough where the whole dish isn't totally overwhelmed by it.  But if that's your thing, then go for it.

Fifty grams will last me roughly five millennia.

When the tomatoes begin to break down you're pretty much good to go.  Add in a teaspoon of garam masala at this point and give it another 1-2 minutes to cook in.  The thing you've just made in the skillet is called "tempering," and you're going to use it to flavor the lentils.


This is adequately gooey.

Now, don't ask me why this is, but it appears that out there are two very opinionated opposing camps.  Some swear that the One True Way to do this is to add the tempering to the lentils.  Others suggest it is barely a step above savagery to do anything other than add the lentils to the tempering.  My thoughts on this are that the skillet is easier to lift than the saucepan, so I do it the first way.  I won't judge you if you do it differently.  It takes all kinds to make the world go 'round.

Possibly the most controversial thing I've done so far on this blog so far.

Notice how gluey the lentils look in that picture above.  That's what you're shooting for.  If there's too much liquid you might have something thinner than that, but you're looking for the lentils to kind of melt into each other.  If your lentils aren't done by the time the tempering is done, just turn the skillet down to low and let it sit, giving it a stir now and then.  It won't hurt anything to hang out on your stove for a while.

Mix the tempering into the lentils, and there's your basic recipe!  Add salt to taste.

Tastes better than it looks, I promise.

Usually at this point is when I add in a generous handful of spinach.  I love the green color it adds.  Do whatever floats ya.

Tadaaaa.  I acknowledge it doesn't look delicious, but it is.

Up Next:  Either pumpkin-molasses cookies or egg curry, depending on which mood strikes me first.


The Abbreviated Recipe
Ingredient List
1 cup lentils of your choice (suggested: a combo of yellow, red, or black)
3 cups water or stock
2-3 tsp oil of choice (suggested: olive oil or ghee)
1 tsp cumin seeds
1 tsp mustard seeds
1-2 minced onions
1 minced chili pepper (optional)
1 tsp ginger paste
1 tsp garlic paste
0.5 tsp turmeric paste
1 tsp chili powder (optional, to taste)
1.5 - 2 tsp coriander powder
scant pinch asafetida (optional)
2-3 chopped tomatoes
1 tsp garam masala
salt (to taste)

Directions
  1. Rinse lentils in a fine mesh strainer with hot water until the water runs clear.
  2. Place the lentils with water or stock in a large saucepan on high heat.  When the liquid boils, turn the heat down to low and cover.  
  3. Simmer the lentils roughly 1 hour, stirring frequently to prevent burning. The lentils are done when they have broken down into a thick consistency.  Add more liquid if needed.
  4. While the lentils are cooking, heat oil in a skillet on medium heat.  When the oil is hot, add cumin and mustard seeds.  Heat until sizzling, about 30-60 seconds.
  5. Add in onions & chili pepper.  Stir-fry for 5 minutes.
  6. Add in ginger & garlic pastes.  Stir-fry another 5 minutes or so.
  7. Add turmeric, chili powder, & coriander powder.  Stir-fry 1-2 minutes, adding a splash of water if paste is dry to prevent spices from burning.  Add asafetida if desired.
  8. Add tomatoes, turning the heat down slightly to a low medium.  Stirring occasionally, heat the mixture for 10 minutes or until the tomatoes have begun to soften and break down.
  9. Add garam masala.  Cook another 2-3 minutes.  
  10. If lentils aren't completely cooked at this time, turn the skillet heat down to low and cover, stirring the onion-tomato mixture (called tempering) occasionally to prevent burning.
  11. When the lentils are cooked, add the tempering and stir to mix.  Add salt to taste.  

Monday, December 9, 2013

Saba no Miso ni (Miso Poached Mackerel)


How often would you say you eat hamburgers?

If you're anything like me, the answer is "once a year, max."  There are people out there, no doubt, who eat them weekly.  Maybe even daily.  Most folks probably fall somewhere between the two.  It sort of straddles the line between a special occasion food and the quintessential fast food.

Just so with sushi.  When I lived in Japan I'd have it a few times a year, usually at work parties or when I'd hit up the local literally fast food joint in town.  Here in America, though, you'd think sushi was a nightly phenomenon considering how it's on just about every single Japanese restaurant menu (and features at a growing number of Chinese and Korean restaurants as well).

As you might guess, most of the recipes I miss most from Japan never appear in restaurants over here, even the exceedingly rare ones that are actually owned by Japanese people (so far I've found only one and it's in Porter Square in Cambridge).  Among my favorite recipes that don't make the cut are Japancakes (I'll be sure to introduce you to these soon) and mackerel.

Saba no miso ni (サバの味噌に) is mackerel that's been poached in a kind of miso-based sauce.  Unlike south Asian recipes, which are largely spice-based, Japanese recipes are more sauce/liquid based (think soy sauce and cooking wine).  Poached mackerel is one of those homey, everyday dishes that really take me back.  It's also phenomenally easy to make, so I thought it'd be a nice place to start for Japanese recipes, especially since Japanese cooking has just become the second cuisine to get cultural heritage status.

As usual, scroll to the bottom for a concise recipe.


Mackerel Poached in Miso Sauce

Total real time:  If I count cleaning the fish, it took about an hour.  If yours is already cleaned, then you're looking at about half an hour, 15 minutes of which is simmer time.

Weirdest ingredient:  Mirin.

Mackerel can be a rare find in grocery stores, depending on where you live.  When I see it on sale near me it's almost always an as-is fish that I have to clean myself.  A whole mackerel, if you will.

 Well, not any more.  Now it's full of holes.

I won't cover how to clean the fish yourself.  If you get one from a place that will clean it for you, then by all means do that.  Otherwise I think probably there are a hundreds of better places to learn it than from me.  The one thing I will emphasize, though, is to double-check for pin bones (the small ones that are -- get this -- pin-sized) because you don't really want to be chowing down on those later.  A pair of kitchen tweezers or sanitized needle-nosed pliers will make this job a lot easier.  Even really good markets will miss a few, so be sure not to skip this step.

Now, one of the very first things you will notice is that mackerel is the fishiest-smelling fish that ever fished.  Seriously.  It has a funk to it, even when fresh.  Doc came home three hours after I'd cleaned the fish and he still, er, observed that the kitchen had the tang of a fishmonger on a full moon.  The reason for the fishy funk is that mackerel, like salmon and sardines, is among the oilier kinds of seafood out there.  That oil is the good kind that keeps your coat shiny (when consumed in moderation, like every other thing).

The way to reduce that funk is to briefly swish the fish (teehee) in nearly-boiling water.  What I do is bring a pot of water to a boil and then add a generous splash of cold water to bring the temp down a bit.

It's about to get a really, really hot bath.

Let the fish soak in the hot water for about 10-30 seconds, just long enough for the fleshy bit to start turning white.  You'll notice I've left the skin on.  That's on purpose.  It's delish.

Ding!  Time to take it out and pat it dry.

Don't let it cook all the way.  Less than a minute is enough.

For comparison: the bottom one has been bathed, the top one has not.

I did four filets (each about half a pound) and by the end the water was gross.  Be sure to rinse the pot out well when you're done.

Ew.

Okay, so now you've got a bunch of (or perhaps just one) filet(s).  Wrap them up in paper towels while you get the sauce ready to roll.

Snug as a... fish.

The sauce is super easy.  What you want are equal parts mirin, sake/rice cooking wine, miso paste, and sugar.  Mirin is one of those things that you might think you'd never find, but surprisingly I find it in the Asian section of almost every grocery store I go into.  It's usually right there with the rice vinegar and cooking sake.  If you have to improvise you could double the sake and add a bit more sugar, but mirin's a really lovely thing to have on hand when cooking fish if you make it often.  It's got a smoothness and viscosity to it that regular sake lacks.

When making miso soup there is a kind of method of dissolving the miso paste carefully into the soup liquid using a ladle and your chopsticks.  We're not making soup here, though, so dumping all these things into the pan is a-ok in my book.  Just whisk them all together and give it a taste.  If it needs salt, add a splash of soy sauce (a little will do, miso's pretty salty on its own).  If it's too sweet, add a splash of rice vinegar.

For four filets I used 3 tablespoons each of mirin, sake, miso paste, and sugar.  You can go light on the sugar if you want, but keep in mind a big part of the purpose of the sugar is to counteract the saltiness of the miso/soy sauce, so just taste it as you go and add sugar gradually.

Left to right: ginger paste, mirin, rice vinegar, soy sauce, sake (aka rice cooking wine).

Bring it up to a light boil, then turn it down to a simmer.  At this point, if fishy tastes/smells really bother you you can add ginger (in slices or in a paste), garlic (likewise), and/or a few sprigs of green onion.  These are entirely optional ways to help de-fishy your dish.

When it's all whisked up and simmering it's time to add your mackerel filets.  

Ready, captain!

I didn't have whole green onions on hand, so that's what that green bottle to the left of middle is up there.  Handy as heck, let me tell you.

Before putting your fish in the sauce, score a little X into the skin.  This helps the sauce permeate the whole filet.  Plus it looks awesome.

X marks my dinner.

Go ahead and place the fish in the simmering sauce.  Now, most recipes I've seen talk about pressing the fish into the sauce with a lid for 15 minutes or using tinfoil to jury-rig one.  I don't like doing extra dishes, nor do I like wasting tinfoil, so I just flip the filet after about 7-8 minutes.

Notice the depth.  It doesn't need to be covered, hence flipping halfway.

When it's done the flesh will be flakey and the skin will have lost its sheen.

Ding!

How easy is that?  About 1/3 of the filet was more than plenty for my dinner.  


I served it over Japanese rice (the sticky kind used in sushi) topped with a splash of the miso poaching sauce from the skillet.  Playing alongside are soup and veggies.  Pretty standard everyday dinner.  Yummo!

How average!

Up next:  yellow lentils (basic dal).  


Quick Reference Recipe

  1. Carefully check a cleaned filet of mackerel for pin bones, removing any with kitchen tweezers or a sanitized pair of needle-nose pliers.
  2. Briefly swish the mackerel filet in water that is just below boiling in temperature.  Remove fish after the flesh just begins to turn white, less than one minute total.
  3. Dry the filet and wrap in a paper towel while preparing the miso sauce.
  4. In a small skillet on medium-high heat,  mix equal parts mirin, sake, and miso paste (typically around 1-3 tablespoons of each, depending on depth of skillet and number of filets).  Add sugar to taste; suggested amount is roughly equal to mirin/sake/miso.
  5. Taste the sauce, adding soy sauce if more salt is needed and rice vinegar if too sweet.
  6. Add a few slices of ginger, a clove of garlic, or a few sprigs of green onion if desired.
  7. When sauce is boiling, reduce to a simmer and add mackerel, skin side up.  Score skin with an X.
  8. Periodically spoon sauce over the skin.  After 8 minutes, flip the fish over carefully.
  9. Simmer for an additional 7-8 minutes or until thoroughly cooked.
  10. Repeat with any remaining filets.


Friday, December 6, 2013

Turkey Curry

I cannot say "turkey curry" without mentally imitating Renee Zellweger's fake English accent.  There was a long, dark period in my life where - without a clue of what curry even was - turkey curry was the epitome of all the weird things that people did in places that were not America.  Without any sense of context I assumed that everything in Bridget Jones was normal British life, including the ineffable New Year's turkey curry buffet.

(I have always wondered... was it a buffet that included turkey curry as the signature dish, or a buffet of different types of turkey curry?  Tricky.  Verrry tricky.)

Around this time of year, having at last exhausted my taste for Thanksgiving leftover paninis and soups, I start to shred the remaining turkey and use it as a substitute for chicken in my everyday recipes. Originally I wasn't going to bother sharing this recipe with you, but after kicking myself all week for not taking photos of a stellar turkey biryani (pilaf) I'd made, I thought I owed you one.  It's a riff off of a basic tomato curry base that I use for chicken (for Doc) or tofu (for me).  The beauty of it is that the sauce and the meat/tofu are cooked separately, so that I can just split the sauce and then add whatever I want to each person's version.  So if vegetarian/vegan is more your style, go ahead and play with this using whatever meat substitute you like.


Scroll to the bottom for a concise recipe if you're in a hurry.


Basic Turkey Curry

Total real time:  With photos and messing around with making rice, salad, and raita at the same time, the long estimate is two hours from start to finish, most of which is simmer time.

Weirdest spice:  fenugreek leaves.


Although I was starting with fully cooked turkey, you could easily use raw turkey/chicken/tofu/protein of choice.  First off, you need to season the turkey (let's just assume that's what it is from here on out, k?).  The four big players in this curry are chili powder (use less, or none at all, according to your tastes), coriander powder, and ginger & garlic pastes.

Haven't I see those guys on the left before?

I used 2 tsp of each on about one half of a turkey breast, but keep in mind that's a rough-ish measurement.  If you have a premixed tandoori powder that you like, this would be a fabulous place to use that in place of the chili & coriander powders.

We likes it spicy.

Stir it all up together.  The oil from the ginger & garlic pastes will help the spices stick to the meat.  If using raw meat you can set it aside at this point to soak up the flavor for as much as 24-48 hours.  Since, again, this was already cooked I didn't worry about that too much.  

A not-so-quick aside:  Depending on the recipe, many cooks like to add yogurt to the marinade when cooking chicken.  This is in large part because the acidity in the dairy helps to break down the tougher fibers in the bird, acting as a kind of natural tenderizer.  I do not do that, for two reasons.  First, Doc complains even at the sight of yogurt.  Second, and more importantly, I have never mastered cooking hot foods with yogurt - especially when adding something acidic like tomatoes - without the whole thing curdling.  After a few dozen ruined dinners I gave up on that.  Besides, with the amount cooking time involved the heat breaks down everything sufficiently anyway.

Getting back on track, they turkey goes into a saucepan with a small splash of Oil of Choice (olive, ghee/clarified butter, baby) on medium-high heat until the meat is cooked.  Again, as this was precooked turkey, about 5 minutes was enough to cook the spices.  If "cooked spices" is as weird to you as it is to me, imagine the flavor difference between raw and roasted garlic.  More on this in just a second.

If using chicken or tofu be sure to cube it first.  That will save you trouble later.

When everything is cooked sufficiently, set the turkey aside on a plate and return to the empty saucepan.  If you've got a bunch of spices and whatever glommed onto the bottom do not panic.  We'll be scraping those up in a minute and it will only enhance your dish.

Okay, so here is perhaps the #1 Biggest Thing I Struggled With when it comes to south Asian cooking.  You've heard that the cooking is "spicy," and if you're anything like me you read that to mean "hot" rather than "full of different spices."  Let me share with you something I've learned the hard way: this kind of cooking has an entirely different relationship with spices than you're used to.  Back when I started I'd read recipes that said to roast or cook the spices first, then add X, Y, or Z main ingredient, and I would panic.  Spices go in later, once the food is in the pan.  That's the way God intended it to be.  Spices first, then food, is just chaos.

Embrace the chaos, my friends.

So to start the curry sauce, first put in about 1 tablespoon of Oil of Choice.  Let it get warm on medium heat.  When the oil is shimmery, add in about 1-2 teaspoons of cumin seeds.

Right about now you will want to scream because everything you know is wrong.  Take a deep breath.

Quick aside:  cumin seeds and cumin powder are not the same thing.  Be sure you have the seeds.

Hint: they look seedy.

In around 30 seconds, possibly sooner, you will notice two things:  (1) a warm, toasty aroma, and (2) sizzling.  That means you're ready for the next step.  More than a minute or so of roasting the cumin seeds and you'll see them start to burn.  This a no-no.  If you burn them, toss them because it will ruin your whole dish.  Truuuuuust me on this (she said knowingly).  It can also happen if your oil is too hot, so be careful.

When your seeds are toasted - or fried, I guess, if we're being truthful - toss in about 1/2 to 1 whole chopped onion.  In a lot of curries it's key to mince the onion as small as possible so that it sort of "melts" into the sauce, but we're going to cheat later and blend this bad boy together, so I just used frozen onions instead.  Frozen onions add about 10 minutes of cooking since they're full of moisture, but it saves me 10 minutes of chopping and that's a fair trade in my mind.  Stir the onions around with the cumin seeds and let it cook until you've got them kinda translucent / mushy but not browned.  

Next I had a handful of cashews (totally optional, but gives it a nice nutty flavor), and roughly 2 teaspoons each of those four main players that we saw back at the beginning: coriander, chili powder (again, optional), and ginger & garlic pastes.  Aren't you glad you have a bunch on hand already?


When you add the spices you'll notice that the onions kind of bind up together into a mess.  A splash of water or stock will help release that and keep your spices from burning.  Again, the idea is to "cook" the spices without burning them.  

So weird!  Hang in there, it gets better in just a second!

Next up is a small handful of fenugreek leaves.  This is almost certainly the weirdest ingredient in the recipe, and something I did without until about a year or so ago.  I wish I hadn't waited so long!  Ultimately I had to order them online because I couldn't find them in stores around me.  If there's a south Asian grocer near you, give it a look.  Either way I give you permission to ahead and skip it the first time around if you don't have any handy.    

Crush them up a bit between your hands before adding.  Smells great and helps release the flavor.

Medium-length aside:  In general, south Asian grocers are an excellent place to buy spices in bulk, including things you might use often like cinnamon and black pepper.  They tend to sell them in bags that are anywhere from a few ounces to a pound or more, and you'd pay about the same for a pound-sized bag as you'd pay for a 4 ounce container at your regular grocery store. 

Okay, now we add the tomatoes.  I'll admit to you that I did not add enough tomatoes to mine and then had to cheat later.  All summer I'd been using tomato puree I'd frozen from our garden tomatoes, and this is the first recipe I'd made since June with store-bought tomatoes.  I'd say about 2 chopped tomatoes per person will do ya, plus maybe one for good luck.  If using canned, go straight for crushed tomatoes (not tomato sauce!!) to save you some trouble.


What you're shooting for is a tomato sauce with some onion & spices in it.  I know people who just buy canned spaghetti sauce and then tweak it.  It's totally up to you.

Okay, now add another splash of water or stock (I used leftover turkey stock), enough to go about halfway up to the top of your tomato-and-other-stuff pile, turn the heat down to low, and let it simmer for up to an hour.  It honestly takes that long for all the spices, tomatoes, and other stuff to sort of seep into each other and cook properly.  The tomatoes will release their juices as you go, so you may end up with more liquid than you started with.  This is a-ok.  Add more water/stock if you need to, stirring every 5-10 minutes to keep it from burning on the bottom.  At the end you should have something resembling a mush.

The green bits are chilis that I added for funsies.  Not a necessary item.

Now, this bit is very important.  I used to skip this step and it totally ruined the flavor.  We are going to blend the tomato mush using either an immersion blender or a standing blender.  Why?  Because otherwise you have a soup, not a curry.  Even if you throw all this in the slow cooker and have a day-long standoff with it, you still won't get the right consistency.  Believe me on this.  Blending is the way to go here.  The thing is, you need to let this mess cool for about 20 minutes if using a standing blender, because you do not want to be blending boiling liquid.  (1) It could cause your blender to crack; and (2) if it bursts you're going to be covered in boiling tomato juice.  Ain't nobody got time fo' facial burns.

You should now have an empty saucepan yet again.  Return the turkey to it, dial it up just barely above a simmer for a minute or two just to warm up the turkey, and then pour your blended sauce over it.  Or, if you've used an immersion blender, just add the turkey into the sauce.

Mmmm, tomato smoothie.

Mine up there does not look right for two reasons.  First, it's too thick.  Second, the tomatoes I used weren't ripe enough and I needed another 1-2 more to get a good tomatoey flavor/color.  So I had to take a secret step correct it.

Ssssssh.

To thin things out, I used turkey stock, but forgot to take a photo of that so I put the carton of vegetable stock in the photo to remind me.  The cream is entirely optional.  I add a dash for fun, you can skip it without any problem.  I also at this point added about 1/2 teaspoon each of garam masala and salt to give it some depth, because the turkey needed some oomph. Depending on whether you use stock, you might not need salt at all.

It's food!

I let it simmer at this point for another half hour or so, just to "cook" the garam masala and let the turkey get comfortable in the sauce.  This isn't strictly necessary so long as you have fully-cooked meat.

And there you have it!
Seen here over rice, with a cilantro garnish.

And here with raita and an orange-olive salad that I added some beets to.


Up next:  mackerel poached in miso sauce (さばの味噌に).


The Busy Cook's Recipe
  1. Coat cooked turkey (or raw chicken/tofu) with 2 tsp each of coriander, ginger paste, garlic paste, and red chili powder to taste.  Alternatively, omit coriander & chili powder and replace with tandoori spice mix.
  2. In a medium saucepan, cook the turkey in 1 tsp of oil on medium-high until thoroughly heated/cooked.  Set aside.
  3. Add 2 tsp oil to the pan on medium-high heat.  When shimmering, add 2 tsp cumin seeds and let roast for 30 seconds or until fragrant.
  4. Add roughly 1/2 cup chopped onion to the pan, stirring frequently for approximately 5-10 minutes until onion is soft but not browned.
  5. When onion is softened, add roughly 1/4 cup roasted cashews, and 2 tsp each of coriander, ginger paste, garlic paste, and red chili powder to taste.
  6. Immediately add a generous splash of water or turkey/chicken/vegetable stock, enough to coat the bottom of the pain and prevent burning.  This also helps to deglaze any spices left over from cooking the turkey from Steps 1-2.  Allow to cook 5-10 minutes, stirring frequently.
  7. Add roughly 2-3 teaspoons of fenugreek leaves, crushing them between palms before adding to the sauce.  Optional: add one chopped green chili, to taste.
  8. Add 3-4 cups diced ripe tomatoes or 1 can crushed tomatoes.  
  9. Add 1-2 cups water or stock of choice, enough to cover the bottom of the pan with about 2-3 inches of liquid.  Add more as needed to keep the mixture soupy.
  10. Reduce heat to a simmer (low heat), cover, and let cook for up to an hour, stirring every 5-10 minutes.
  11. Remove from heat, let cool 20 minutes.
  12. Blend sauce, using extreme caution not to blend hot liquid (wait until cooled to lukewarm, adding ice cubes if necessary).  
  13. Return sauce and cooked turkey to the saucepan, turning heat up slightly to barely higher than a simmer (not quite medium heat).
  14. If desired, add a splash each of stock and cream to thin out the sauce.  Garam masala and salt may also be added at this time, to taste.
  15. Let cook on low heat for up to half an hour to let flavors infuse the turkey.  
  16. Serve hot.