Showing posts with label baked goods. Show all posts

Monday, December 15, 2014

Spiced Apple Butter Cookies


Winter's a week away.  Can you believe it?

Central Pennsylvania's been attempting winter in fits and starts for several weeks already.  We had a lovely little dusting of snow back around Thanksgiving.  No sunshine since then, though.  I've had to make my own sunshine by spending my free time either in the kitchen or with friends.  Ahhh, such a life.  

My holiday gift-giving this year is entirely food -- sweet pickles, apple butter, and homemade wine (recipes to follow).  Oh, and cookies!  When I got an email in October about the Great Food Blogger Cookie Swap, I just knew I had to be a part.  Cookies in exchange for donating to a great cause, and an excuse to use up some leftover apple butter?  Yes yes yes!  

There was more than once that I nearly chased the delivery truck down the street while waiting for my cookies to arrive.

I was lucky enough to receive jam and hazelnut snowballs Carrie at Fresh from Oregon, red velvet cookies Lynna from Hearts in My Oven, and brown butter shortbread cookies from Sara at Confectionary Tales of a Bakeaholic.  I mean, can you even believe how beautiful these are?


They were a perfect mix.  I'm only a little ashamed to say I lived entirely on cookies for a while there.

How did I pick which cookies to send?  Well, to be frank I was shooting for something that was warming without being too sweet.  I'm not big on sweets and I just happened to have about four quarts of apple butter sitting around, so I tweaked the pumpkin molasses cookies from last year.  The result was chewy, soft, and almost reminiscent of an apple quickbread in bite-sized form.  If you like your cookies to lean to the sweet side, consider rolling them in (or dusting them with) cinnamon and sugar and/or adding mix-ins such as apple chunks or cinnamon chips.  You could also try a maple, ginger, or brown sugar glaze for an extra little sumthin'.  You have my permission to be creative!

Apple Spice Cookies

Total Time: 15 minutes to mix, 45-60 to refrigerate, 12-14 to bake, 10 to cool.
Yield: 45 cookies (1 TBS dough portions)

Ingredients:

  • Wet Ingredients
    • 0.5 cup butter, room temperature
    • 1 TBS cream cheese, room temperature
      • can sub: neufchâtel or mascarpone cheese
    • 1 cup sugar
    • 1 egg
    • 0.25 cup molasses
    • 1 tsp vanilla extract
    • 1 cup apple butter
  • Dry Ingredients
    • 2.75 cups all-purpose flour
    • 2 tsp baking soda
    • 1/2 tsp salt
    • 1 tsp cinnamon
      • can increase to 2 tsp if you want a stronger flavor
    • 1/2 tsp ginger
    • 1/2 tsp cloves
    • 1/8 tsp nutmeg
    • 1/8 tsp allspice
Directions
  1. Use a large mixing bowl to beat together the butter and cream cheese until they form a fluffy paste.
  2. Add the sugar and cream the butter, cream cheese, and sugar together until they form a thick paste.
  3. Add the egg, molasses, and vanilla to the bowl and beat until mixed well.
  4. Beat in the apple butter and set the bowl aside.
  5. In a separate bowl, whisk together the dry ingredients until well-combined and no lumps remain.  
  6. Pour the wet ingredients over the dry and gently mix the two together by hand until the flour just disappears.  Be careful not to overmix!
  7. OPTIONAL:  if adding apple chunks or cinnamon chips, stir them in gently at this point.
  8. Wrap the bowl and place it in the fridge for 45-60 minutes.
  9. Preheat the oven to 350F.
  10. Remove the dough from the fridge.  
  11. Use a 1 TBS scoop to portion out dough balls.  Place dough balls several finger-widths apart, as they spread out quite a bit (~12-15 per baking sheet).
  12. OPTIONAL:  if desired, used wet fingers to gently roll the balls into a uniform shape and/or dip them in cinnamon and sugar.
  13. Bake 12-14 minutes, turning the tray 180 degrees halfway through.
  14. Allow to cool 10 minutes on the baking sheet.
  15. OPTIONAL: frost or glaze after cookies have cooled completely.

-------------------------------------------------------

Let's walk through it step by step!

First off is beating the butter and cream cheese together.


Once they form a fluffy paste, you're all set.


Put the sugar in the bowl next.


It will be difficult to photograph, but don't worry.
Next, beat the sugar & butter mix together until it forms a thick paste.  This process is called "creaming" the butter and sugar, and it's the basis for just about every cookie ever.


Next are the vanilla, egg, and molasses:


I kind of love that photo.  It's such a mess.
Mix all that up into a wet goo.


And then let the apple butter join the party.


I made the apple butter at home, recipe to follow shortly (short version: cook applesauce to death).   Most orchards and a number of grocery stores carry it, usually somewhere near the jams or peanut butter.  

Anyway, mix all that up and set it aside. 
Now, in a separate bowl, whisk together all your dry ingredients.


You can double the cinnamon if you want (or all the spices, for that matter), assuming you like a very strong flavor in your cookies.  I'd love to suggest that you start with the original amount to start and then scale it up according to your tastes, but don't let me hold you back.

Next, the wet ingredients get added to the dry.  


Mix by hand.  Gently!  Only stir it until the flour juuuuust disappears.  You want to almost err on the side of undermixed, though there shouldn't be any flour visible.  If you're putting any add-ins, such as apple chunks or butterscotch chips, do that here.  But again, don't overmix this.  It requires a light hand or you'll end up with tough cookies.

Tough cookies, sweetheart.


I find the dough is too sticky to work with at this point, so I pop it in the fridge for 45-60 minutes.  Ultimately that's optional, I just don't like to fight the dough.  Once it's cool, fire up the oven and use a 1 TBS cookie scoop (or just a measuring spoon) to portion out dough balls onto a greased sheet, parchment, or silpat.

If you like uniform, smooth cookies you can use wet fingers to gently roll them into rounds, but it's not necessary.  You can also sprinkle cinnamon & sugar over them, or dip / roll them if you want.  I'm not big on sugar so I don't, but it's your choice.  (Seriously, it's choose your own adventure with these!)


Be sure to leave plenty of space between cookies, 'cause they spread.  I can fit about 12-15 on a tray.  Whatever doesn't make it into the oven goes back into the fridge between batches, 'cause the dough warms up quickly.

They typically take about 12-14 minutes at 350.  At around 6-7 minutes, turn the tray 180 degrees so that they bake evenly.


They're gonna smell pretty divine, let me tell you.


They're fantastic warm, but do try to let them cool for 10 minutes before burning your mouth on them.  If you're going to glaze or frost them, wait until they're completely cool or you'll end up with a mess.

Voila!  They stay chewy for several days and freeze well.  Or you can pack them up and mail 'em off to your cookie swap partners.  



Tuesday, April 22, 2014

Saffron Sugar Buns (Trini Hot Cross Buns)


It's been many years now since I first discovered Trini sugar buns.  I don't often venture into West Indian / Caribbean cooking, but when I do I'm usually pleased with the results.  There's something incredibly appealing about that kind of fusion cuisine.

I came across Trini sugar buns one year when I was searching for a new take on hot cross buns.  The idea of adding in saffron to a lightly-sweetened, milky cinnamon bun was just what I was searching for.  In the years since it's become a tradition of sorts, though I never actually add the icing.  They're just as good for a non-holiday brunch as they are for Easter, too.


Saffron Sugar Buns (Trini Hot Cross Buns)


Total Time:  30 mins prep, 2-2.5 hours rising, 25 minutes baking.


Credits:  The idea of adding saffron and turmeric to sweet rolls came from The Trini Gourmet.  The base roll recipe is a sweetened version of a dinner roll recipe that's been in my family for generations (affectionately known as The Rolls).

Makes:  24 small buns or approximately 18 large ones.


Ingredients:
  • 0.5 cup raisins (optional, can sub currants/sultanas if preferred) + roughly 1 cup of boiling water
  • 1 cup + 1 tablespoon milk (whole is best, but ok to sub as per your preferences)
  • 0.25 tsp saffron threads
  • 6 tablespoons sugar, divided
  • 1/3 cup warm water
  • 1 package (2.25 teaspoons) yeast
  • 5 cups bread flour
  • 0.5 teaspoon turmeric powder
  • 1 teaspoon cinnamon powder
  • 1.25 teaspoons salt
  • 2.5 tablespoons vegetable shortening
  • 2 eggs
Glaze:
    • 1/4 cup milk
    • 2 teaspoons sugar
    • 0.5 tsp cinnamon
Icing (optional):
    • 1 cup 10x (confectioner's/icing) sugar
    • 4 tablespoons milk
    • 1/4 tsp lime juice
    • pinch of salt
Directions:
  1. Place the raisins in a heat-safe cup and cover with enough boiling water to leave 2 inches of water on top.  Set aside for 30 minutes to plump.
  2. Meanwhile, heat the milk using stovetop or microwave and stir in 3 tablespoons of the sugar until completely dissolved.  Once milk is hot enough to produce steam, remove from heat and add saffron.  Set aside to cool while the saffron infuses the milk.
  3. Dissolve the remaining 2 tablespoons of sugar into the lukewarm milk.  Add yeast and set aside to proof (5-10 minutes or until foamy).
  4. Whisk together flour, salt, cinnamon, and turmeric.
  5. Add shortening to the flour mix.  Blend until the flour takes on a grainy texture.
  6. Add yeast mixture to the flour, mix.
  7. Whisk eggs into the milk and mix until well-combined.  Knead 2-3 minutes.
  8. Drain the raisins, pressing out any extra moisture.
  9. Add raisins to the dough and knead 1-2 minutes or until combined.
  10. Cover with a warm, damp towel and side aside to rise until doubled (about 90 minutes).
  11. Form rolls (24 small or 18 large) by stretching dough over itself and pinching together at the bottom [see pictures below].  Space approximately two finger-widths apart in a well-greased pan.
  12. Brush with milk glaze, cover with warm, damp towel, and aside aside to rise until doubled again (about 30-45 minutes).  NOTE:  if preferred, rolls could be covered with plastic wrap at this point and allowed to rise in the fridge overnight.  
  13. Brush again with milk glaze just before baking. 
  14. Bake at 325F for 25 minutes (may take slightly longer for large buns).  Halfway through, rotate the pans 180 degrees and brush again with milk glaze.
  15. Allow buns to cool completely on a wire rack.
  16. Optional:  whisk together the icing ingredients while buns are baking and place them in the fridge to cool.  Top with icing once buns are completely cooled.
-----

The trick to this particular recipe is to start the raisins and the saffron milk before doing anything else.  

The reason for plumping the raisins in hot water is to keep them from sucking all the moisture out of the buns as they bake.  If you're feeling adventurous you could also use milk or whiskey/rum.  I find hot water does the trick just fine.  Just make sure whatever cup you use can handle boiling water.  Cover them completely, plus a few inches extra on top to give them room to grow.


See how much they plump up? 

Next up is the saffron milk.  One important thing to remember if cooking/baking with saffron is that you won't get much flavor unless you infuse it into a warm liquid first.  I did this on the stovetop.  Microwaving is also an option.  You don't need to get the milk boiling or anything -- just warm it enough to steam a little and dissolve the sugar.  Once the milk is warm sprinkle the saffron on top, using your fingers to crush the threads a little as you go.  I took this picture as soon as I could grab my camera, and you can already see the color/flavor leeching into the milk just a few seconds after I put the saffron in.


Take it off the heat and let it cool.  You don't want the milk to be too hot when you add it to the dough or else it'll kill your yeast.  Lukewarm is okay. 

Note:  if you want to cut down on dishes, you could put the raisins into the hot milk along with the saffron.  I tend not to because then I find the buns get a little too raisin-flavored and the saffron flavor gets buried.  Up to you.

While the milk and raisins are busy working their mojo dissolve the remaining sugar and yeast into the lukewarm water.  


This is calling "proofing" because what you're doing is making sure (proving) that the yeast is alive.  That was more of an issue in the old days but is still a good idea if you tend to keep yeast for months or years.  It's not a strictly necessary step, though.  The proof that the yeast is active/alive is that it starts to digest the sugar, which we can indirectly observe by the gas that it lets off.  That's where the foam comes from:


Neat, huh?  And only a little bit gross.  Try not to think about it.  

While the yeast is chowing down on the sugar water and belching up proof (yum), whisk together your flour, salt, cinnamon, and turmeric:


The spices will kind of disappear into the flour.  Not to worry, the saffron is going to give the buns a nice yellow color.  

Next up is the shortening.  If you're like me, shortening kind of freaks you out.  If you want to give butter or even lard a try, I won't stop you though I can't guarantee that it'll come out the same.  You might have to play around with measurements a little.


Blending in the shortening will change the texture of the flour so that it's more grainy:


Okay, so now you've got all the major components.  First the proven yeast goes in:


Mix that up, whisk the eggs into the cooled milk (make sure it's only lukewarm, not hot):


See how yellow the milk got?  That's all the saffron-y goodness.  Once the eggs are whisked in, add that to the flour:


Blend it all into a dough.  If you're using a mixer, like I was, you may want to stop partway through to change from a paddle to a dough hook.  


Once it all comes together like the above, you can knead it for about 2-3 minutes.  That should give you a soft, springy dough:


At this point drain the raisins, pressing any extra moisture out, and add them in.  Another minute or two of kneading should be enough to mix them in.  


Your dough is done!  Wet down a clean cloth with hot water and drape it over the top of your mixing bowl.  The dough will rise at different rates depending on how warm your kitchen is -- usually about 90 minutes is adequate to get it to roughly double in size.

When the dough has risen it's time to shape it into buns.  I usually opt for smaller ones for the simple reason that I really like these buns and usually go for a second one whether I need it or not.  

There's a trick to getting round(ish) buns and rolls that goes like so:  stretch the dough through your fingers and tuck it in on itself until it's round and smooth.  Here's the first step, where I'm using the thumb of my left hand to push the dough through a ring made with the fingers of my right hand:


Please forgive my giant ham hands and instead focus on how this is stretching the top of the bun so that it's smooth.  Doing that will give you a kind of pocket at the bottom, which you can then pinch together:


Again, ham hands.  Sorry.  But anyway, if you put the bun seam-side down into your pan, nobody will ever know that the bottom is kind of puckery:


See?  And now your bun isn't all lumpy.

Lather, rinse, repeat until all the dough is used up.  Space them about two finger-widths apart and don't panic if you don't end up with an even number.  I had to go back and add extra leftover dough to a few just so I wouldn't have to start a third pan.


Aside:  does anyone else think it's weird when recipes say to put baked goods X inches apart?  Does anyone actually get out a ruler and check?

Next you'll want to brush these with the milk/sugar/cinnamon glaze.  This will add a little extra sweetness, but more importantly it'll keep the buns from drying out too much while they rise.  


Cover them with a warm, damp cloth and let them rise again until the buns are about doubled in size -- roughly half an hour, maybe a smidge more.

Brush 'em down with the milk glaze again when they're all risen:


And now it's time to bake!  The total baking time is 25ish minutes at 325F.  Halfway through brush them down with the milk glaze again and rotate the pans 180 degrees so that they bake more evenly.

When you're done the tops should be lightly browned and shiny:


Tadaaaa!  

If you're making the icing:  whisk the sugar/milk/lime juice together while the rolls are baking and put it in the fridge to firm up.  Drizzle it over the top once the buns are cooled.  I don't particularly care for icing so most of the time I skip that step.  

I prefer to eat them hot out of the oven with a little coffee.


Yum!


What I like best about these is that they're a-mazing right out of the oven, but they also toast up nicely the next day.  Just split them in half and pop 'em in the toaster oven for a minute or two to heat them back up.  

Sunday, February 9, 2014

Irish Scones


I've been trying for the better part of a month to get this recipe made and uploaded.  The issue hasn't been ingredients or equipment, it's been that these scones are sublime.  If I make them I want to eat them.  So I try to save it for when I know I'll see people I can give them away to.  Even though they freeze very well, they thaw rather quickly and can be warmed up easily in a toaster oven -- meaning that even when I try to make them inconvenient they're still there.  Waiting.  Calling my name.  I find myself finding excuses to sneak another ("well, if I skip dinner tonight and go to the gym tomorrow...").

The beauty of this recipe isn't just the ease or speed of making them, or even that it calls for olive oil instead of butter.  To me the winning factor is how incredibly versatile it is.  I've made these with fresh berries of all kinds, chocolate chips, butterscotch chips, cinnamon and sugar, caramel swirls, apples, pumpkin, lavender, lemon zest, maple syrup, chai spice, dried cranberries, oats, orange zest...  So while this particular version of the recipe uses blackberries and vanilla powder, I hope you'll please feel free to experiment and make these your own.


Irish Scones

Total Time:  15-20 min assembly, 10-15 min baking
Weirdest Ingredient:  buttermilk
Credits:  I wish I could say that this recipe was handed down through the Cullen or Delaney family traditions on either side of my family, but the truth is it comes from this article in The Atlantic.  The recipe itself is tucked into a set of paragraphs toward the bottom.  Their version is -- in my opinion -- unnecessarily complicated.  Once the dough is assembled they fool around with it a bunch for reasons that seem purely aesthetic.  Personally I feel I haven't got the time or patience to get fancy with this dough, so my take on it is just to plop the scones onto a baking sheet and let them be a little ugly.  The dough is so very sticky that I can only imagine I'd end up stress-eating the entire pan by the time I was done anyway.  But please do check out the original for the full story of their origin and for tips.

The overview of this recipe is dry ingredients + wet ingredients, stir gently, add optional mix-ins, & bake.  Let's get started!

While you're getting the dough ready, preheat the oven to 500 degrees F.  (Scary, I know.  It always makes me uneasy when the oven goes over 400 degrees.)

The dry ingredients are:  2.75 cups White Lily* flour, 2 teaspoons baking powder, 0.5 teaspoon salt.  

You can sift them together if you like.  I usually just use a wire whisk to knock the lumps out.


*Flour:  The original recipe calls for White Lily, which lies somewhere between all-purpose flour and pastry flour in terms of how chewy it gets.  Two years ago I'd have put in a paragraph here explaining what the protein gluten is and why one kneads bread but not pastries.  Back then, in the dark ages, the only person I knew who avoided gluten had celiac disease (a serious digestive disorder distinct from gluten sensitivity, both of which are wildly different from and quite a lot rarer than fad dieting).  She struggled not only with meeting her nutritional needs but also with finding anything gluten-free that didn't taste like cardboard.  These days there are a lot more options out there and that's fantastic for people who have digestive disorders.  But that's not why this recipe recommends low gluten.  The reason is so that your scones will be closer to cake texture than bread texture.  The original recipe has some suggestions for substitutions.  I found White Lily in my local Walmart, but please feel free to substitute regular all-purpose flour if you want.  Don't rely solely on cake or pastry flour for this or everything will crumble apart.  Scones need the structural integrity that just a little gluten gives them, so err on that side.  (Cake flour is cut with corn starch, you see, to keep the gluten really low.  Pastry flour is slightly less diluted, making it a tiny bit tougher.)

Additional aside:  Just to be clear -- because I don't want anyone to think I'm being critical -- I've got no feelings one way or the other about gluten-free dieting.  I think it makes people more aware of what they put in their bodies and that's not necessarily a bad thing.  Otherwise, like anything else it's about moderation and choosing what's best for you based on both your own experience and the recommendations of a physician or registered dietician, who, just to lighten the mood, is different from a nutritionist.)

Anyway, getting back on track, that's your dry ingredients and a little food science.  Next up are the "wet" ingredients:  1 cup buttermilk**0.5 cup olive oil (I know, right??), 0.5 cup sugar, & 1 egg:


Whisk it all together:


**Buttermilk:  I've had luck both with substitutions and with powdered buttermilk, so no worries if you can't find it or don't want to buy a whole pint/quart just for one recipe.  I'm there with ya.  I haven't tried vegan alternatives so let me know if you find something that works for you.

You can either add your mix-ins to the wet ingredients or you can do what I do below and add them just as the dough comes together.  

The next step is to add the wet ingredients to the dry.  I use a wooden spoon to make a hole in the flour:


And then pour the wet ingredients in:


The liquid part above has 1 tsp vanilla powder in it, that's why it changed color.  If you're going to add spices or zest I'd recommend whisking them into the wet ingredients first just because the liquid helps bring out the flavor a little and our goal here is to stir the dough as little as possible.  

The trick at this point is to work quickly since once the wet and dry ingredients hit each other your baking soda is going to start doing its thing (fizzing, thereby adding fluff to your scones), and the quicker you can "capture" that in the oven the fluffier your scones will be.

Gently stir until almost all the flour is incorporated:


This is the point where I add my solid mix-ins like berries, candy chips, zest, seeds/nuts, or what have you.  Feel free to mix and match.  A few of my favorite combos are ground cinnamon & butterscotch chips, raspberries and almond slivers, and lemon & lavender.  I've found that for berries and chocolate in particular they start to soften a little into the liquid and then the flour gloms onto them in weird ways.  For this particular one I tossed in about half a cup of fresh blackberries:


At this point just stir until the mix-ins are squished into the dough and the flour's gone.  For me that was something like 4-5 more stirs:


The more delicately you treat the dough, the more "delicate" the pastry will be.  Please don't beat these to death.  I don't even use a mixer since it takes so little stirring.  Anyway, if you're going the easy route then just scoop out your dough onto a baking sheet.  I don't bother to grease the pan because they don't seem to need it, though you can if you're feeling anxious.


What I do is use a 1/4C measuring cup for the first one and then eyeball it for the rest.  That gives me about a dozen and a half scones.  

Some tips:  The dough is super sticky.  If you want neat rounds you could follow the original recipe, which calls for cutting the scones out in circles.  I feel like I'd go mad if I tried this, so I just spoon them out.  If you like your scones not to be spikey or ugly like the ones above, try wetting your fingers and patting them into a neater round.  I did this with the second tray, below, so you can see the difference.  You can also whisk up one egg to brush over the tops.  That'll help them brown up a bit and puts a nice glaze on the top.  Because I already struggle not to eat these by the handful I tend to skip that step to cut out a few calories, but when I make them for company I do brush with a very thin coating of egg using a pastry brush.  It's up to you, I think.

Okay, now, this part is very important:  Turn the oven down to 425F immediately after you put the scones in the oven.  (Please.)

The general guideline for baking time is 12 minutes.  In reality baking times vary depending on how big your scones are.  I've made bigger ones with a 1/3 or 1/2 cup of dough per each, which boosts up the baking time by a minute or two.  My recommendation here is to err on the side of too short and sneak a peak at around 10 minutes.  They bake super fast and when they're done they're not as brown as you'd think they should be.  For example, the first batch I popped in for the 15 minutes recommended in the original recipe and they got a little too brown in places (but still edible and very delish):


The second batch, the one where I used wet fingers to pat them into prettier shapes, I only baked for 12 minutes (making sure to rotate the pan 180 degrees halfway, as with any baked good).  They came out closer to the right color:


If you're panicking that they're not browned enough just remember that these are Irish scones.  They're supposed to be too pale because they burn easily.  

Well, not burn so much as dry out.  I've left them in for way too long before and they don't scorch so much as turn gradually into rocks.  I don't recommend it.

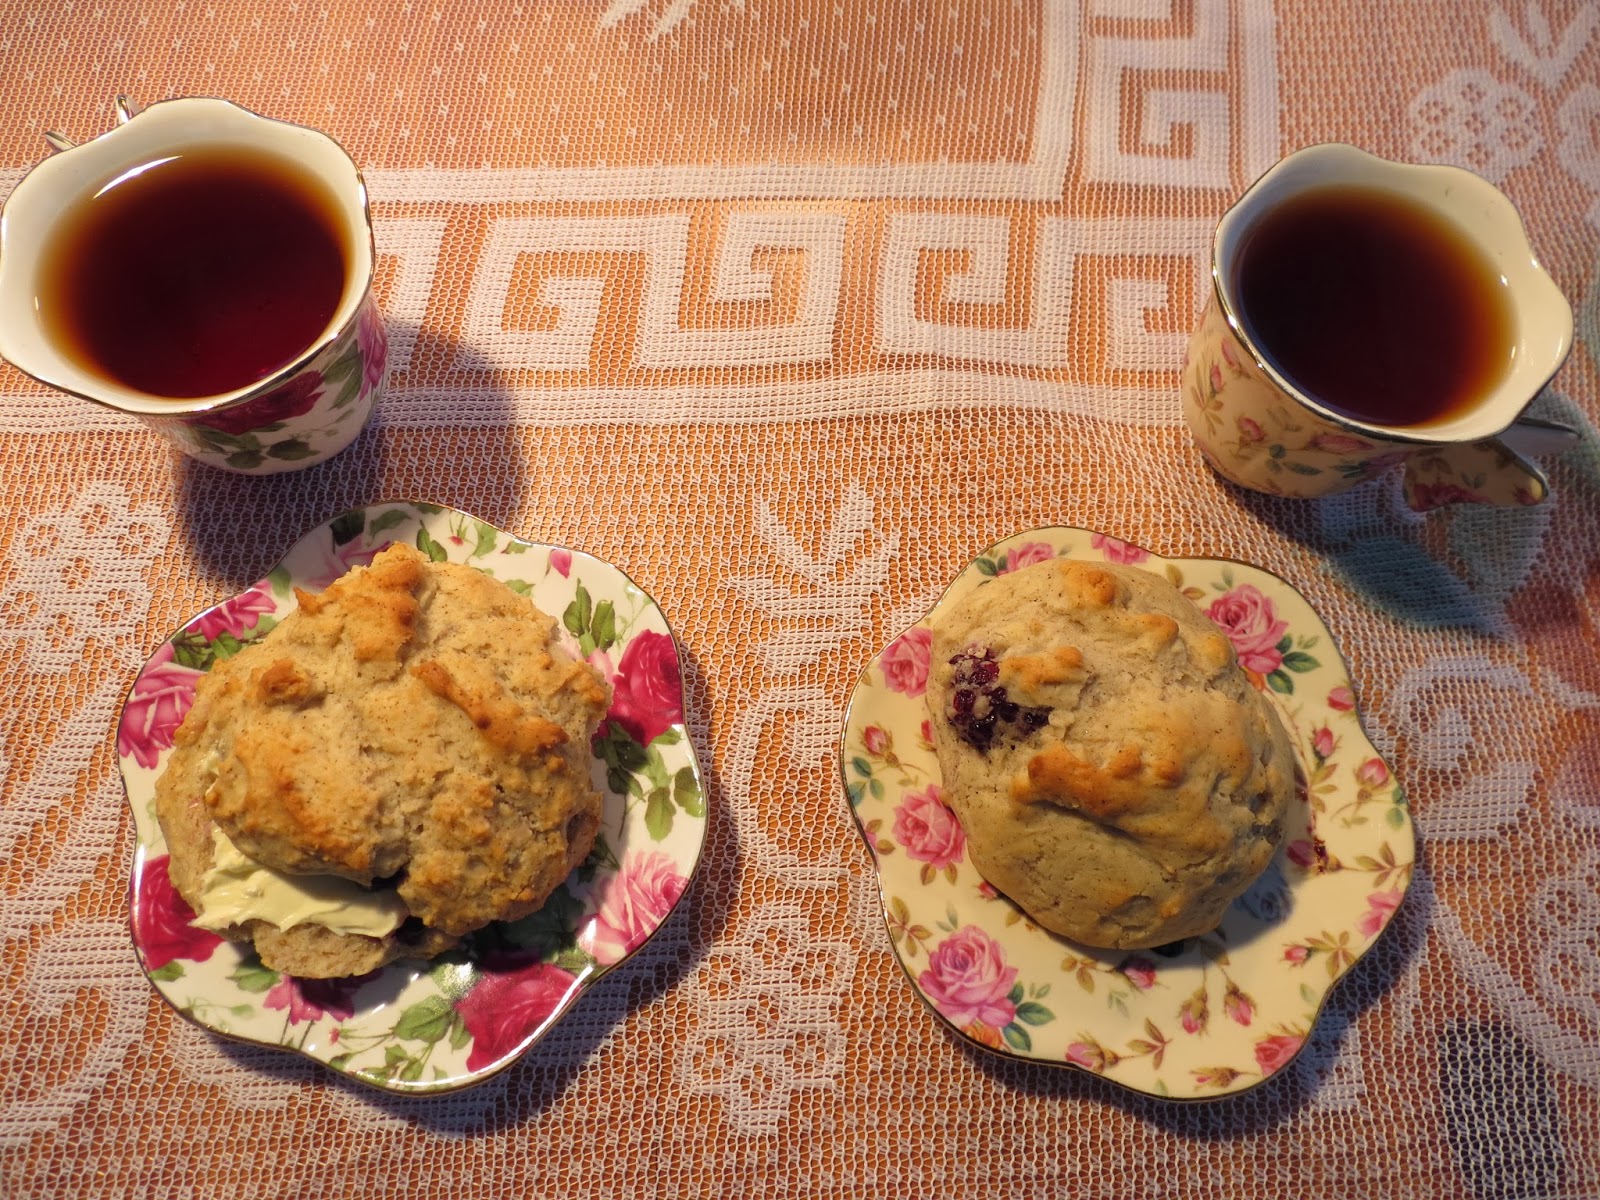
But yeah, that's it!  Whenever I post recipes like this I get nervous that too many pictures makes it look like the recipe is hard, but honestly I feel like it's just barely more involved than cake from a mix.  Or maybe I'm just motivated by the thought of hot scones, strong tea, and a little dollop of clotted cream:


These are best shared with a friend, I think. 


I have no idea what's up next.  Possibly another lentil recipe.  Got any suggestions or requests?


Irish Scones
Makes 12-18 scones, depending on size
Dry Ingredients:
  • 2.75 cups White Lily flour
  • 2 tsp baking powder
  • 1/2 tsp salt
Wet Ingredients:
  • 1 cup buttermilk
    • substitution tips here
  • 0.5 cup olive oil
  • 0.5 cup sugar
  • 1 egg
Optional:
  • 1 egg, beaten, to brush over top
  • mix-ins of your choice
    • Note:  mix-ins are entirely optional.  The rule of thumb is 1/2 cup total mix-ins.  Add powdered mix-ins (e.g. cinnamon) to the wet ingredients to help incorporate them.  Add solid mix-ins just as dough is coming together (see photo above).  The scones pictured above used 1 tsp vanilla powder and 0.5 cup blackberries.

Directions:
  1. Preheat the oven to 500 degrees F.
  2. Whisk together dry ingredients in a large bowl using a wire whip.
  3. In a separate bowl whisk together wet ingredients, adding any optional powdered mix-ins such as spices.
  4. Using a wooden spoon, create a hole in the middle of the dry ingredients and pour in the liquid.  Working quickly, gently stir the dough until the flour is nearly incorporated.  If adding solid mix-ins such as berries or candy chips, add them at this stage.  Gently stir a few more rounds until flour is incorporated.  Take care not to over-mix or scones will become tough.
  5. Spoon roughly 1/4 to 1/3 cup of dough onto a parchment-lined baking sheet.
  6. If desired, shape the scones into neat rounds using wet fingers.  Brush the tops with the beaten egg using a pastry brush.
  7. Place scones in the oven and immediately turn down heat to 425F.
  8. Bake 10-12 minutes, rotating the pan halfway.  Finished scones will be pale in color.
Scones freeze well or can be reheated in a toaster oven.  They are pleasant plain or can be eaten with butter, jam, or clotted cream.