Showing posts with label stir-fry. Show all posts

Saturday, March 29, 2014

Jajamen (Morioka Noodles Part One)


Is your hometown famous for anything?

If I were hard-pressed to pick a few things that locals consider famous about my hometown I might come up with hot cider donuts, rubbery mini-dogs, a whole lot of very pretentious posh/artsy attractions, and of course fueling the cold war back when General Electric (later General Dynamics) was heavily involved in building bombs.  Not every hometown story can be a proud one, I guess.

When I first started taking Japanese lessons I remember being stumped by the question of what my hometown was famous for.  It wasn't something many of us in the class had ever given much thought to.   Certainly I didn't have a ready answer for it.  "What's my hometown famous for?  I don't know... people trying to leave it, I guess?"

But in Japan that's a question that nearly everyone has an answer for.  I can tell you, without really stopping to think, what many of the towns near my old home are famous for.  My village, for example, is known for wine and a type of traditional dance called kagura.  Tono, the next village over, is famous for being the Japanese equivalent "a kingdom far, far away," wasabi beer that locals love to give to unsuspecting visitors as a joke, and its particularly delicious horses (yes, you read that correctly and yes, they were rather delicious).  Less unsettlingly, the prefectural capital is known for things like the Sansa Odori festival, cast-iron teapots, and the Three Great Noodles of Morioka.

It's also famous for crackers.  

Of the Three Great Noodles, two are fusion dishes.  Jajamen, this week's recipe, is a Japanese version of zha jiang mian / jajangmyeon (Chinese and Korean noodle dishes, respectively).  Morioka reimen, which I'll post in a few months once the weather heats up, is a version of a Korean cold noodle dish called naengmyeon.  The third type, wanko soba, isn't a specialty recipe so much as it is a unique kind of eating/politeness contest where the object is to slurp down your tiny bowl of noodles and put the lid on your bowl before the waitress who's hanging over your shoulder can refill it.  It really doesn't get more Truly Japanese than wanko soba and if you're ever in that part of the world I highly recommend it as a bit of hysterical fun (and a way to appreciate just how much people can eat when pride is on the line).

What I like about this recipe is that it's quick and fairly straightforward to put together, and that customizing it to your own tastes is very much a part of The Way It's Done. 


Jajamen (Spicy Black Bean & Garlic Noodles from Morioka)

Total time to make:  About 15-40 minutes, depending on your multi-tasking skills.
Weirdest ingredient:  Black bean sauce, used as a replacement for 甜麵醬 ("tianmianjiang"), a Chinese flavoring made from red miso paste.  Happily, black bean sauce is fairly easy to find in the pan-Asian/international section of many grocery stores, even here in a low-diversity area like rural PA.  Alternatively, if you have red miso paste on hand you could make your own tianmianjiang for a more authentic flavor.


Credits:  The recipe below leans rather heavily on this Cookpad recipe (in Japanese), with input from this one (also in Japanese), and English-language Japanese and Korean versions of the dish.
Makes:  2-3 servings.  


As a heads-up, Jajamen is a recipe in two parts.  Unlike other multi-step recipes, you have to eat the first part before you can make the second.  That's part of the fun.  Stay tuned and you'll see what I mean below.  Also, if you see pork in the recipe and are tempted to give up (I myself eat pork maybe 1-2 times a year at most -- to be honest it kind of grosses me out), know that this recipe would also be really excellent with eggplant (particularly Chinese eggplant), extra-firm tofu, or even black beans as a substitute.  

Before you get started with the stir-fry bit, put on a pot of water to boil in a pan big enough to cook your noodles.  In a separate pan, put on 2 cups of chicken or vegetable stock to boil as well (note: it's a-ok to use bullion here if you prefer).  You'll also want to pull one egg per person out of the fridge and put it on the counter to warm up a little.  

Okay, so the first step in making the sauce is to saute up a generous handful of mushrooms.  Use whatever kind you have on hand, I say.  I had shitake, but you're not going to feel left out if you use something else.  For this recipe I'd say about 1 tsp vegetable oil and 1/4 tsp of sesame oil is a nice combo to use in a skillet on medium-high heat:


While the mushrooms cook (about 3-5 minutes, just enough to soften up), you can dice up two pork chops into very small pieces.  Alternatively, use ground pork or veggies such as the ones suggested above.  I used pork chops because they were on sale:


Once the mushrooms are softened, the pork goes into the skillet as well.  Depending on how small your pieces are the meat will take anywhere from 5 to 15 minutes to cook all the way through.

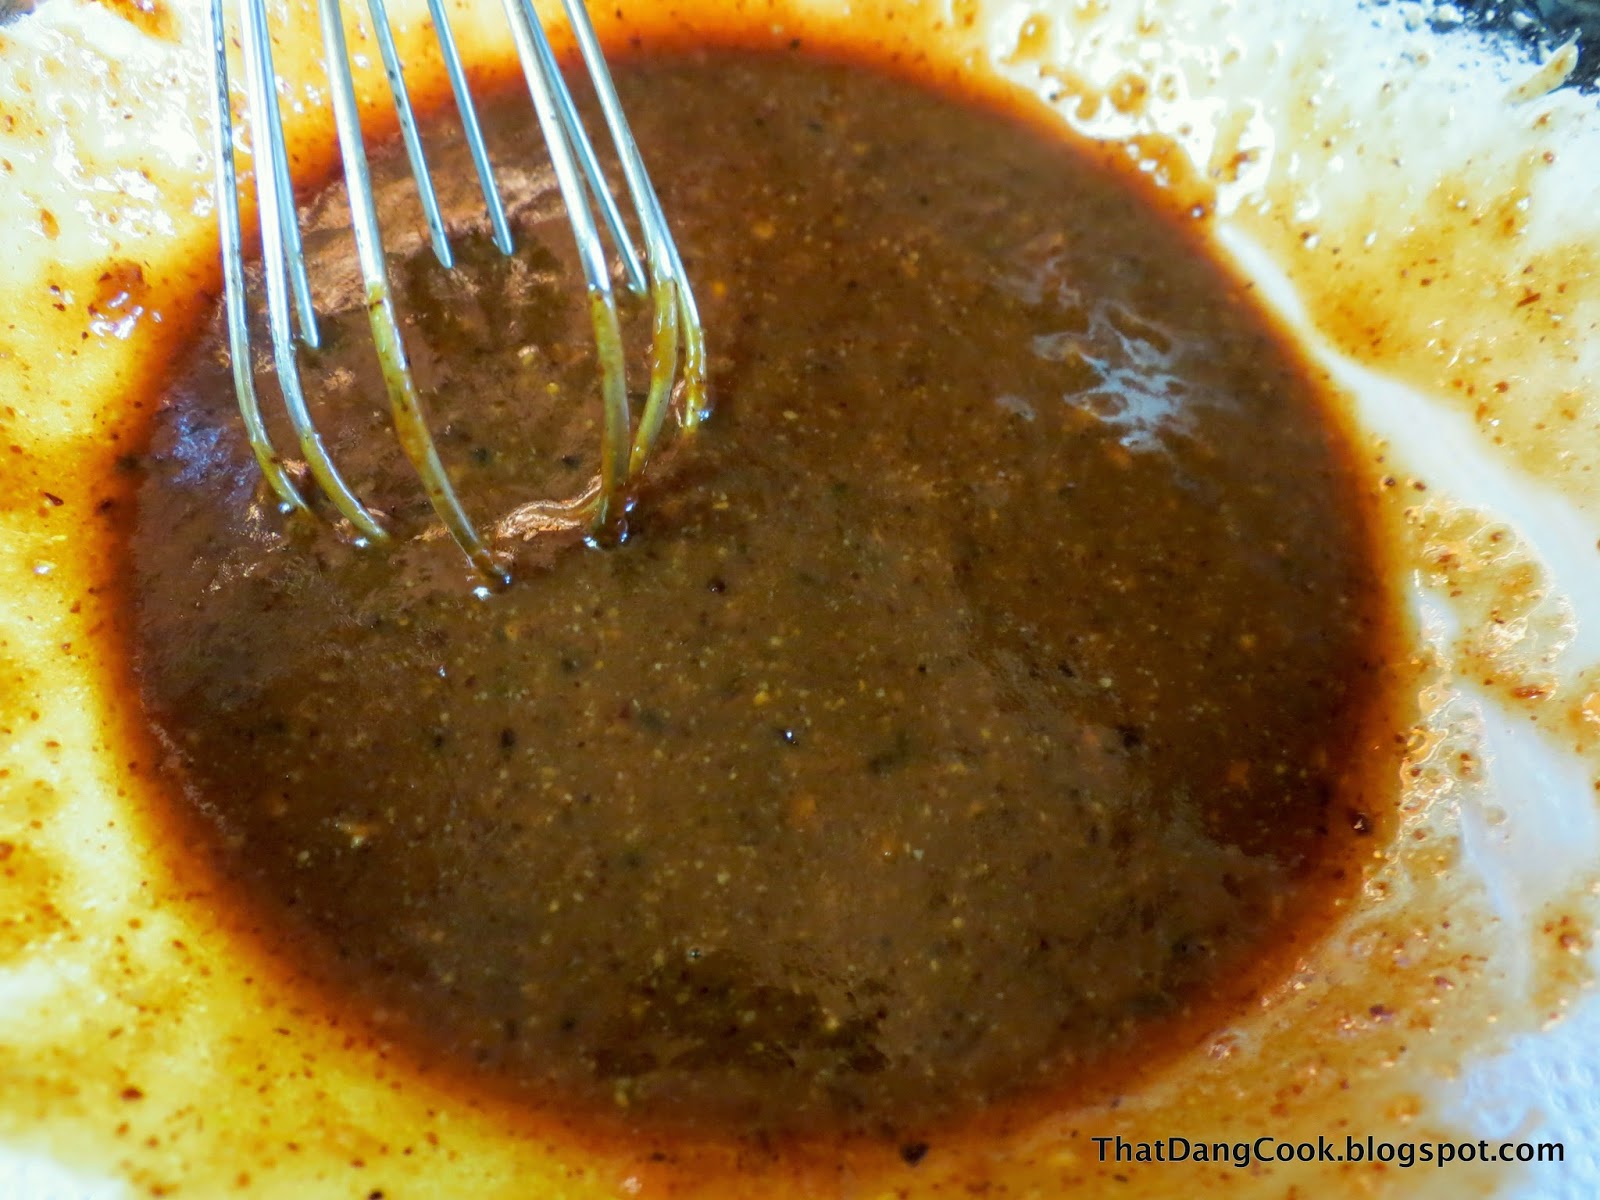
Put together the sauce while the pork is cooking.  Gather the following up in a bowl:  2 tablespoons of miso paste (either red or white), 1 teaspoon each of ginger paste and garlic paste, 1 teaspoon sugar, 1 tablespoon of rice wine (cooking sake), 1 tablespoon of soy sauce, 1 tablespoon of mirin (or else add an extra tablespoon of rice wine and two teaspoons of sugar), and 1 tablespoon of the black bean sauce:


Whisk all that together into a smooth sauce:


And when your pork is completely cooked through add the sauce to the skillet:


Turn the heat down to low at this point, cover it, and let it simmer for at least another 5 minutes to let the sauce soak in.


While the sauce is simmering, slice up some cabbage (optional) and thin cucumber slices.  

When the veggies are cut, drop 2-3 servings of noodles into the boiling water you prepared before you got started with the stir-frying.  Does it matter what kind of noodles you use?  Yes and no.  I've seen udon, soba, Chinese noodles, and even ramen (minus the spice packet) used for this dish.  I say go with whatever you like best.  I used udon.  Follow whatever directions come on your noodle package in terms of boiling time, then drain the noodles and rinse them briefly with cold water to prevent them from over-cooking.


Now we get to the arranging part.  Noodles go in the bowl first:


Followed by the cabbage and cukes:


And then the sauce.  


Now, if you're going for complete jajamen authenticity then you may want to puree the sauce so that it more closely resembles a thick paste than a stir-fry.  That is totally up to you.  I have this weird pet peeve where I hate washing my blender so I didn't puree the sauce, though it did change the texture and feel of the dish somewhat to skip that step.  If you do puree the sauce then just be sure to let it cool a bit before sticking it in your blender to avoid damaging anything.  A tiny bit of broth or sesame oil can help if it's too sticky to blend properly.

When eating jajamen in restaurants it's very common to get a wide array of condiments to mix with it, such as extra garlic, La-Yu (chili oil), chili paste, scallions, and even vinegar.  I myself love a deep spicy kick to my noodles, so I opted for a dash of sriracha:


Tadaa!  Dig in!

"But wait," you say with concern and dismay.  "What about the egg and the chicken broth from back at the very beginning?"  

I'm so glad you asked.  Eating the noodles is the first course of the meal.  You can choose to completely empty your bowl, leaving only the leftover sauce  or -- my preference -- leave about 1/4 of the noodles in the bowl:


At which point you crack the egg into the bowl (really!):


And immediately top it with the boiling chicken or vegetable stock you've had sitting on the stove.  Use your spoon or chopsticks to whisk everything around for a minute or two, thereby tempering the egg and making an impromptu egg-drop soup.  


Note: if the idea of cooking the egg in this way weirds you out too much, or if you want to leave no doubt that your egg is totally cooked through, crack the egg(s) into the boiling stock on the stove, whisk, and let them cook for 2-3 minutes that way.  The only real difference is that you'll end up with chunkier egg pieces rather than a rich, eggy broth.  That said, whether you add the egg to the soup or the soup to the egg it'll still cook through and will be delicious.  I promise.  But I do totally understand the queasiness some folks might feel about putting a raw egg into their bowl, so no judgment here if you choose to do it the other way.


So now you get to have soup as a second course!  Yum!  

This is a really great dish to warm you up on chilly day, especially around this time of year when winter hasn't quite given up its hold yet.


Jajamen (Morioka Miso-Garlic Udon)

Ingredients:
  • water for boiling noodles
  • 2 cups chicken or vegetable stock (from scratch, can, or bullion)
  • 2-3 servings of udon, soba, or Chinese noodles
  • one egg per person
  • 1 tsp vegetable oil + 1/4 tsp sesame oil
  • generous handful of mushrooms
    • note: for a more Chinese/Korean feel to the dish, other vegetables (e.g. zucchini) can be used in addition to or in place of the mushrooms
  • 2 pork chops, finely minced
    • can sub ground pork, diced eggplant, cubed extra-firm tofu, black beans
  • 2 tablespoons of miso paste (either red or white)
  • 1 teaspoon each of ginger paste and garlic paste
  • 1 teaspoon sugar
  • 1 tablespoon of rice wine (cooking sake)
  • 1 tablespoon of soy sauce
  • 1 tablespoon of mirin 
    • can sub an extra tablespoon of rice wine and an extra two teaspoons of sugar
  • 1 tablespoon of black bean sauce or sweet bean paste
    • see long-version of the recipe, above, for notes
  • small handful each of shredded cabbage (optional) and thinly-sliced cucumber
  • condiments according to preference, common options include:
    • scallions
    • La-Yu sesame chili oil
    • rice vinegar
    • garlic
Directions:
  1. In separate pans, put the water for the noodles and the stock on high heat.  Let these come to a boil while completing steps 2 - 8.
  2. Add the oils to a skillet on medium-high heat.  When the oil is hot, add the mushrooms and cook for 3-5 minutes or until softened.
  3. While the mushrooms cook, dice the pork.
  4. Add the pork to the skillet, stirring occasionally, and cook through (5-15 minutes, depending on size of the pork pieces).
  5. While the pork cooks, whisk together the miso, ginger, garlic, sugar, sake, soy sauce, mirin, and black bean sauce and set aside.
  6. When the pork is cooked through, add the sauce and reduce the heat to low.  Cover and allow to cook for a minimum of 5 additional minutes.
  7. (OPTIONAL:  Allow the stir-fry to cool until lukewarm and puree in a blender or food processor to make a thick paste.  If desired, return the paste to the stove and re-heat.  This step is not shown above although it makes a more authentic-looking end product.)
  8. While the sauce is simmering, slice the cabbage and cucumbers into small pieces.
  9. While the sauce is simmering, add the noodles to the boiling water prepared in step 1 above and cook for the amount of time indicated on the package.
  10. When noodles are done, drain & rinse briefly with cold water.
  11. To serve the noodle course:  layer the noodles, cabbage & cucumbers, and sauce in an individual-sized bowl.  Top with any condiments as desired.
  12. To serve the soup course:  Leave approximately 1/4 of the noodle course in the bowl.  To this add one egg and top with the boiling stock that you prepared in step 1.  Whisk using chopsticks or spoon for 1-2 minutes or until egg is cooked in the broth.  
  13. (Alternatively, drop the egg(s) into the broth while it is boiling on the stove and allow 2-3 minutes to cook through before adding to the bowl.)


Saturday, March 15, 2014

Indian Brunch Part 2: Parsi Eggs (Akoori)


Hi there!

You'll find Part One here, in case you missed it.  Since I did a fairly long intro there I'll err on the side of brevity here and just give a little background before launching into the recipe.

Akoori, also called Parsi eggs, are a kind of spicy scrambled egg with middle-eastern-slash-south-asian influences.  What, you might ask, does that mean?  Well, to be quite honest it means that there's any spice at all -- at least compared to how I grew up on them, where black pepper and parsley were about the height of egg adventurousness.  If you've had a southwest scramble before these are in the same vein: veggies, egg, and a little kick.  I made them a two weeks ago alongside upma (savory cream of wheat) and a modified raita where I swapped out the cilantro and veggies for lemon zest, mango, and blueberries.

Skim to the bottom for a condensed recipe.


Parsi Eggs
Total time:  10 minutes to prep, 15-20 to cook.

We're going to start this adventure like we do so many other recipes here:  add 1 tsp cumin seeds to 0.5 tsp oil that's been heated on medium-high heat.  Wait until the seeds sizzle (about 10-30 seconds):


Now, what veggies you use is totally up to you.  I went for a fusion touch because I like mushrooms in my eggs.  If you want to skip any of these veggie choices or sub in your own (eggplant, kale, spinach, chard, peas, zucchini, whatever, etc.), then please do that.  If mushrooms are your thing, cook those first:


Give them about 5 minutes and plenty of space ("don't crowd the mushrooms," as Madame Julia used to say).  Then add minced onions:


Give those about 3-5 minutes to soften up, then about 0.5 tsp each of ginger and garlic (minced or paste):


And, after letting that cook for 2-3 minutes, add in any other squishy veggies you like.  I added a tomato and some bell pepper:


I let those continue to cook on LOW heat (as in, turn it down at this point) while I mix up my eggs and that seems to be enough time (about 2-3 more minutes) to bring the whole shebang together.  If you'd like, go ahead and add 0.5 tsp cumin powder and/or 1 tsp fresh minced cilantro the stir-fry.

As for the eggs, I used 2 eggs, a dash of milk, 0.5 tsp turmeric, and 1 tsp chili powder (please adjust to your own taste):


When the eggs were all whisked I poured them in the pan over my veggie stir-fry:


And then just let them cook for a few minutes until the eggs started to firm up.  This part works just like regular scrambled eggs, so I didn't bother to take extra pictures of that process.  Once the eggs start to firm up just push them about gently until there's no more runny bits, and you're done!


They're more traditionally served with toast or flatbread, not unlike the scrambled eggs you're probably used to.  I always feel so accomplished starting off my day knowing I've already gotten one serving of veggies in.


Ingredients:

  • 0.5 tsp oil
  • 1 tsp cumin seeds
  • Apx. 1/4 cup each vegetables of your choice.  Some suggestions to get you started are:
    • mushrooms
    • onions
    • tomatoes
    • bell peppers
    • chili peppers / jalepenos
    • green peas
    • zucchini, squash, or eggplant
    • dark leafy greens such as spinach, kale, or chard
  • 0.5 tsp minced ginger or ginger paste
  • 0.5 tsp minced garlic or garlic paste
  • 0.5 tsp cumin powder
  • 1 tsp minced cilantro (fresh coriander)
  • 2 eggs, whisked with an optional dash of milk
    • NOTE:  the milk isn't vital, but adding a tiny splash to eggs when making an omelet or scrambled eggs helps it to puff up and helps to stretch your eggs a little further.  That said, it should be known that this is kind of a ghetto kludge and is frowned upon by Real Foodies.
  • 0.5 tsp turmeric powder
  • 1 tsp red chili powder (optional, adjust to taste)
  • salt & pepper to taste

Directions:

  1. On medium-high heat, cook the cumin seeds in hot oil until they sizzle (about 10-30 seconds).
  2. Add any vegetables that take longer to cook, such as mushrooms or onions.  Allow 3-5 minutes each for these to cook until soft. 
  3. Add ginger and garlic, saute with veggies 1-2 minutes or until fragrant.
  4.  Add soft veggies such as tomatoes, leafy greens, or peppers and turn the heat down to low.  
  5. Add cumin and cilantro, stir occasionally on low heat for 2-3 minutes while whisking eggs.
  6. In a mixing bowl whisk together eggs, milk, turmeric, and chili powder.  
  7. Pour egg mixture over stir-fry and allow to cook until the eggs are just beginning to set.
  8. Using a spatula or wooden spoon, gently push the eggs around the pan once, breaking them into smaller pieces.  Continue to stir occasionally until eggs are cooked through.   (Note: be sure the pan is on low heat before starting this step.)
  9. Serve hot with toast or flatbread.


Sunday, March 2, 2014

Indian Brunch Part 1: Upma (Cream of Wheat with Stir-Fried Vegetables)


India is a stupendously diverse place, you guys.

Every time I refer to something as "Indian" I get a little ping of guilt.  Not only is the country itself huge, it's chockabock full of hundreds of different subcultures that vary by caste, ethnic group, religion, region, and of course the normal variation that occurs just from family to family.  To help confuse things more, when I say "Indian" I often mean "South Asian, generally," or "countries in the Indian sub-continent," because several countries in South Asia have a number of similarities across culture and cuisine and it's difficult to hone in on what precisely I mean without the wording getting awkward.  It's kind of like how people refer to America when a number of things that are true for the U.S. are also true for Canada, but maybe not the case across the entire North American continent.  Or the difficulty that some of us experience when trying to refer to places in and around the United Kingdom and the Republic of Ireland.  These things get tricky.

So when I say this is an "Indian" brunch, I'm using that as a shorthand to refer to a couple dishes I put together this past weekend using savory, produce-filled breakfast-type foods that are sometimes served in parts of South Asia, though I've added some fusion elements to bring it more in line with my own tastes.  As if all that weren't confusing enough, part of the brunch was a dish called akoori, or Parsi eggs, which have a middle-eastern influence.

Although I made the upma and the akoori together for a single Sunday brunch, there is nothing in the world stopping you from making them separately.  To my knowledge they're not commonly eaten together.  I like the idea that both are similar to western breakfast foods and the carbs in the cream of wheat complement the protein in the eggs, resulting in a more balanced meal than either provided on their own.

Do what makes you happiest, I say.  And as always scroll to the bottom if you want the condensed recipe.


Upma (Savory Cream of Wheat with Stir-Fried Veggies)

Total Time:  About 20-30 minutes, depending on how fast you chop.
Weirdest Ingredient:  curry leaves
Credits:  Believe it or not, I first spotted a version of this recipe in a Betty Crocker cookbook that Doc got me the week I moved in with him.  From there I adapted it using influences from Veg Recipes of India, Vegan Richa, and Indiaphile.  Making upma is like making oatmeal: you can personalize it pretty much any way you want, so please feel free to get creative with the ingredients.

Because this all comes together so fast I suggest gathering all the ingredients first and then cooking.  Normally I tend to dig things out as I go, but for this I line it all up ahead of time.  Which, as you probably know, is how "real" cooks do it.  I never seem to have the patience to think that far ahead unless there's a reason I need to move quickly.

First, let's talk terminology.  Semolina is a wheat by-product made from soft (durum) wheat and is coarser than flour.  When boiled with water, it makes a porridge that -- depending on your location -- is called either cream of wheat or farina.  In the west we tend to eat it like oatmeal: typically as a hot breakfast cereal with sweet additives like cinnamon, honey, or fruit.  Raw semolina is also a popular way to dust pizza stones (along with cornmeal) to give that grainy, slightly nutty quality to the crust.  In India (see above re: shorthand) one of the many uses of semolina (aka sooji / suji) is to boil it up, similar to cream of wheat, but with savory elements like vegetables and spices.  I've also seen versions of upma made with vermicelli noodles and quinoa, so I'd like to think that this recipe is pretty forgiving of substitutions.  The quinoa in particular appeals to me since that'd be a wonderful way to swap in some extra protein if that's of interest to you.

Completely unnecessary trivia:  Like cream of wheat and grits in the U.S., upma is more of a "southern" dish -- in this case referring to the south part of India and into (so I've read) Sri Lanka.  For northerners like me (and north Indians like Doc), it's a less common food where we're respectively from.  In fact, until I started researching this post I wasn't 100% certain of the difference between cream of wheat (made from -- get this! -- ground wheat) compared to grits (made from ground hominy, or white corn treated with lime).

Isn't learning fun?

So anyway, to get started the first thing is to "roast" the semolina grains.  Not a strictly necessary step if you're in a hurry.  On medium-low heat, I use a skillet to heat 3/4 cup of semolina (more than plenty for two adults) for about 3-4 minutes, stirring them about every 20-30 seconds or so:


What you're looking for is a color shift from pale white to more of a very, very light golden.  Thing is, it was very cloudy and my camera battery was running low, so I wasn't really able to capture that color shift in a photo.  This is the after shot, which is ostensibly the same color as the one above.  I guess the advantage there is that it shows we're not looking for a dramatic browning of the grains here -- just enough to give them a lightly toasted flavor is plenty:


Take the pan off the heat and scrape the grains into a separate bowl to cool.  I then use a damp paper towel to wipe down the skillet to remove any semolina dust and then re-use the same one for the next step, which is to heat 1 tsp of oil (ghee is a popular choice, I myself prefer olive oil) and 1.5 tsp of mustard seeds:


You'd think I'd just start recycling these oil + seeds photos from all the other Indian recipes I've posted, and yet I can't seem to shake the impulse to take a fresh photo each time.

Anyway, about 10-30 seconds is plenty of time for the mustard seeds to start to sizzle, at which point you'll want to add 1 tablespoon of dal (small lentils, I used masoor dal since they cook fast) and 2 tablespoons of unsalted broken cashew pieces:


Because the dal are so small they can actually cook about as well in oil ("dal fry") as they do in water.  Give 'em about 2 minutes of stir-frying -- as in, you keep stirring continuously as they fry -- before adding in 2 tsp of curry leaves (okay to omit if you don't have them):


Stir-fry for 1-2 minutes.  Next up are 1/3 cup of minced onion (any kind is okay, doesn't have to be a red onion like in the picture) and 1 tsp of ginger paste:


Stir-fry this for another 3-5 minutes to soften up the onion, then add in Veggies of Your Choice.  Tomatoes, green chillies, and peppers are popular.  I swapped the chilies for spinach.  There's about a quarter cup of each vegetable here.  I encourage you to add more or swap things out according to your tastes.


Another 3ish minutes should be enough to soften up the veggies, at which time you can add an optional teaspoon of red chili powder for kick, if you'd like:


Last is 1/3 cup of green peas.


You don't have to stir-fry these if you're using frozen since they'll heat up enough in the next step.  Overcooked peas get mushy so unless you're using raw I'd immediately push everything to the edges:


And then add in 1.5 cups of either vegetable stock or water and the roasted semolina you made a few minutes ago.  The rule is 2x as much liquid as you've got semolina, in case you want to adjust the amounts.


At this point I reduce the heat to low and just stir it every 1-2 minutes until all the liquid is absorbed.  As you might guess, the semolina expands quite a bit when it's cooked.  As long as the dish is hot and all the liquid is absorbed (add more if you want to water it down some), you're done:


If you've got other things going on the stove then feel free to let this sit on low heat.  Give it an occasional stir to prevent burning or sticking.


I added in fruit raita (swap in fruit of choice, such as berries, pomegranate seeds, mango slices, apple, banana, etc. for the veggies in this recipe) along with akoori (Parsi eggs) to round out the meal.


Upma (Savory Cream of Wheat)

Serves 2-3 adults

Ingredients:
  • 3/4 cup of semolina (also called sooji/suji or farina/cream of wheat)
    • It's okay to use 2 packets of plain cream of wheat / farina from the cereal aisle since it's just a pre-measured serving of semolina.
  • 1 tsp oil or ghee (clarified butter)
  • 1.5 tsp mustard seeds
  • 1 TBS dal/lentils (such as masoor dal or urad dal, ok to mix multiple kinds)
  • 2 TBS unsalted cashew pieces
  • 2 tsp curry leaves (okay to omit)
  • 1/3 cup minced onion
  • 1 tsp ginger paste
  • Apx. two cups of thinly-sliced vegetables of your choice (e.g. bell pepper, chili pepper, spinach, mushroom, tomato, kale, zucchini, cooked potato cubes, shredded carrot, etc.)
  • 1 tsp red chili powder or paprika (optional)
  • 1/3 cup frozen green peas
  • 1.5 cups vegetable stock or water
  • 2 tsp minced cilantro (fresh coriander) for optional garnish
  • salt & black pepper to taste
Directions:
  1. In a large skillet on medium heat, roast the semolina grains 3-4 minutes or until very lightly toasted.  Remove from skillet and set aside in a separate bowl.  Wipe down the skillet with a damp paper towel and return to stove.
  2. Roast mustard seeds in hot oil for 10-30 seconds or until they start to sizzle.
  3. Add lentils and cashew pieces, stir-fry 2 minutes or until lentils just begin to brown slightly.
  4. Add curry leaves and stir-fry another 1-2 minutes.
  5. Add onion & ginger paste, stir-fry 3-5 minutes or until onions soften.
  6. Add vegetables, stir-fry 3-5 minutes or until soft.
  7. Add chili powder, stir-fry 1 minute.
  8. Add green peas and immediately push all vegetables to the edge of the pan to create a hole in the center.
  9. Into the cleared space add first the liquid (stock or water) followed by the semolina.
  10. Stir the mixture every 1 minute or so for about 5 minutes or until semolina has absorbed all the water and heated through.  Turn down heat to low.
  11. If desired, add additional liquid to thin out the mixture.  
  12. Add cilantro if desired, along with salt and pepper to taste.
  13. Can be served either hot or cold.


Sunday, January 26, 2014

Chili Paneer

Has it been cold where you are?

Everything is relative, of course, but lately around here it seems that folks have been experiencing the cold more than usual.  I've been taking it in stride since even an extra cold Pennsylvania winter is a warm-to-average New England winter.  It even makes me a little homesick to be honest.  I miss bulking up in extra layers of baggy sweaters and thick coats.

Then again I don't miss waiting for the T is freezing temperatures or walking to class when it's below zero.  All things in moderation, hey?

With all the cold, grey weather I got to wanting something spicy and colorful for dinner.  Almost as soon as I think of spice and colors I think of a snappy little Indo-Chinese dish called chili paneer.


Aren't the names of south Asian foods wonderful?  They tell you all you need to know.  Chili paneer is made of peppers and cheese -- along with plenty of hot spices, of course.  Paneer, for those who aren't familiar, is a kind of home-made cheese.  I've seen it called "Indian cottage cheese" before.  For me cottage cheese isn't solid, though, so I shy away from calling it that.  If anything the flavor is closer to ricotta.

Paneer can be bought at an Indian grocery (check the freezer and dairy sections).  It can also be made at home with a minimum of effort (summary: boil milk, add lemon juice, strain).  It can be very simple or you can add a little flavor to it.  Either way it's a soft, squishy cheese with a slightly grainy texture that adds a welcome richness to a dish that otherwise is spicy stir-fried peppers.

If spicy foods intimidate you (and that's okay, we don't judge here) then go ahead and skip the hot spices.  It's a very flavorful dish even without the heat.

Let's get started, shall we?  Consolidated recipe at the bottom, as usual.


Chili Paneer
Total Cook Time: 45 minutes
Weirdest Spice: curry leaves

First off, if you're looking for other versions of this recipe you might have to search for "chilly paneer."  Don't let the ever-popular misspelling fool you.  This stuff packs a punch.

The original recipes that I learned to make this dish from do two things that I disagree with.  First, they deep-fry the paneer.  Personally I feel like if I'm going to eat solid milk fat, stir-frying it is quite sufficient.  Deep-frying is cardiac insult on top of injury at that point.

Second, the original recipes add things such as "ajinomoto" (the first recipe) or cornstarch (the second one).  I've got no problem with either as ingredients.  I just don't think either of them really enhance this particular dish since it's already got a lot going on.

Educational Aside:  Ajinomoto is a Japanese company that was started by the dapper gent who discovered MSG.  Despite its bad rep, MSG isn't some dangerous kill-you-dead cancer chemical.  In fact, it's got a lower toxicity than salt.  To give you a ballpark figure, let's assume humans metabolize MSG similarly to mice.  Based on that, a rough estimate is that a 60 kg (132 pound) adult would have to eat 900 grams or just shy of two pounds of MSG for it to be lethally toxic*.  You can take in as much as 10 grams (roughly 5 teaspoons) of it at a time without any adverse effects.  In other words, it's a flavoring just like any other.  It's popular in east Asian cooking because it adds a savory (umami) taste to food.  In fact, without the guy who discovered MSG we wouldn't even have the word umami (a portmanteau of umai, "yummy," and mi, "flavor," telling you everything you need to know).  There'd be a whole fifth of our available tastes -- salty, sweet, bitter, and sour being the other four -- that we wouldn't have a word for.  Cool, right?  So don't hate on MSG.  It's like Certain Other Anecdotes that have gotten into the media convincing people that something harmless will make them or their kids sick.  There simply is no scientific evidence to back it up.

So anyway, getting back on track and off my soapbox, I'm not using MSG in this dish not because it's some bogeyman spice.  I personally find that I don't need this dish to have more flavors in it.  It's already spicy and a little sour.  As for the cornstarch I don't let my chili paneer get watery enough where that's a necessary ingredient.  But do please feel free to check out the originals recipes above since I'd like to give credit where it's due.  If you'd like to include either MSG or cornstarch please feel free.  No hard feelings.

Whew!  That was a lot of background, eh?  Sorry for the detour.


You're going to want sliced onions, sliced bell peppers, and cubed paneer on hand before you start:


I used four bell peppers, one medium-sized onion, and one 14 oz. package of paneer that yielded about two cups cubed paneer.  I really like to use multi-colored bell peppers in this to make the final dish pop.  There's nothing preventing you from using green bell peppers or whatever's on sale.

I started off with our familiar starting point:  heating 2 tsp of cumin seeds in 1 tsp of oil heated on medium-high heat until they sizzle -- about 30-60 seconds or so.


I used olive oil.  You're welcome to use whatever you prefer.  Next are the sliced onions.  They don't have to be sliced super thin since this is a stir-fry and so we're not trying to dissolve them into a curry.


Saute the onions for 5-10 minutes or until they start to turn translucent.  Next up are 2 teaspoons each of ginger paste and garlic paste.


After that is a half-cup of diced jalepeno peppers.  I used frozen.  You can use fresh or canned if you'd prefer.


Stir-fry that for another 3-5 minutes, then add in the bell peppers:


Cook that for 3-5 minutes to soften up the peppers.  Personally I like to err on the side of less cook time at this point since I like my peppers to have some snap.  At this point we add in spices:  1 tsp cumin powder, 2 tsp coriander powder, 1 tsp chili powder, 0.25 tsp cayenne, 0.5 tsp paprika.  If you want to go milder then please feel free to omit or reduce the jalepenos and/or chili powder/cayenne/paprika.


Stir it up and then immediately add your liquid flavorings:  juice from 1 lemon or lime (your choice), 2 tsp soy sauce (can sub 1 tsp soy + 1 tsp fish sauce if you want), and 1 tsp Sriracha (ok to sub chili-garlic sauce or omit entirely).  Personally I like to whisk them all together in a separate bowl just to make sure I haven't gotten any lime seeds in the juice.  This time I had a lemon on hand so I used that:


Mix those in and then stir-fry until most of the liquid has evaporated off.  This is a fairly dry dish.  You can feel free to turn up the heat a tiny smidge if you're feeling impatient.  I find that at medium-high heat this process takes about 5 minutes.  About 2 minutes into that process I add 1 teaspoon each of curry leaves and cilantro (fresh coriander) and 1 tablespoon of diced scallion:


Bet you can guess our last step, hey?  When all the flavors are cooked in it's time to add the paneer.  Now, since we haven't deep-fried it the cost is that we have to treat it gently since it crumbles easily.  Just stir slowly and you should be fine.  Even if it crumbles a bit that's not a big deal.


I usually turn off the heat when the paneer goes in, stir it up a bit, and then just let it sit while I dish out the rice and set the table.  If you want to heat it up a bit more you can cook it for another few minutes.  Just be sure to turn the heat down to low so as not to scorch the paneer (it's made of milk meaning it's high in sugar and therefore will burn easily).

And that's it!  Dish it out over rice and you're done.


I like to garnish it with a little extra scallion.  That's optional, of course.

Tips:  (1) Add more lime juice if you find your dish is too spicy for you.  That will help to counter-act it.  (2) Add a tiny sprinkle of brown/palm sugar if it's too sour or too salty.  (3)  Don't add salt to this before you taste it.  Soy sauce is very salty and if you add salt before you taste it you might end up with a dish that's too salty for your tastes.  I myself never add any extra salt at all.


* Feel free to correct me re: my understanding of the MSG paper.  My research training was in squishy, earthy-crunchy humanities.


Chili Paneer
Ingredients:
  • 4 bell peppers, diced (any colors ok)
  • 1 onion, cut into thick strips
  • 1/2 cup diced jalepeno pepper (optional, adjust to taste)
    • can sub: green chilies (fresh, frozen, or canned all OK)
  • 1-2 cups diced paneer
    • can sub: 1 pound diced extra-firm tofu
  • 2 tsp ginger paste or minced ginger
  • 2 tsp garlic paste or minced garlic
  • 1 tsp oil
  • 2 tsp cumin seeds
  • 1 tsp cumin powder
  • 2 tsp coriander powder
  • 1 tsp chili powder + 0.25 tsp cayenne powder + 0.5 tsp paprika (optional, adjust to taste)
  • juice of 1 lime
    • can sub: juice of 1 lemon
  • 2 tsp soy sauce
    • can sub: 1 tsp soy sauce + 1 tsp fish sauce
  • 1 tsp Sriracha (optional, adjust to taste)
    • can sub: chili garlic sauce
  • 1 tsp curry leaves (can omit if unavailable)
  • 1 tsp fresh cilantro
  • 1 tablespoon diced scallion (plus extra for garnish if desired)

Directions
  1. Heat oil in a large skillet or wok on medium-high heat until shimmering.  Add cumin seeds and cook 30-60 seconds or until sizzling.  
  2. Add onions.  Saute 5-10 minutes or until translucent.
  3. Add ginger & garlic pastes and jalepeno peppers.  Stir-fry for 3-5 minutes or until fragrant.
  4. Add bell peppers and stir-fry for 3-5 minutes until peppers just barely begin to soften.
  5. Stir in cumin, coriander, chili powder, cayenne, and paprika.  
  6. Mix together soy sauce, lime juice, and Sriracha.  Add these to the pan and stir to coat.  Cook 2-3 minutes.
  7. Add curry leaves, cilantro, and scallion.  Cook an additional 2-3 minutes.
  8. Add paneer, gently stir in using extra caution to avoid breaking up paneer and allow to sit for a few minutes before serving.  (Note: can leave on low-low heat for as long as needed, stirring occasionally to prevent the paneer from burning.)