Showing posts with label Cucumbers. Show all posts

Wednesday, April 9, 2014

A Martini Fit for a Spring


Spring might just be here to stay this time, you guys (she said, jinxing it).

At least I certainly hope so since I've been spending the majority of the last week turning over and fencing my garden.  We're not big drinkers at our house -- Doc doesn't drink at all -- but after putting up 100 feet of fence and wire I had sunshine and relaxation on my mind.

I'm sure all my family are now hanging their heads in shame that I've admitted I mix martinis at home, but there ya have it.  I thought it was high time I shared a drink recipe with you.

At any rate, the combination of weekend tiredness and spring in the air took me down this road.  The title picture says "raspberry mint," but I've also enjoyed this with strawberries and basil.  Feel free to get creative.

Speaking of creative, I thought I'd try swapping up the format by putting the quickie version of the recipe at the top and then going into detail at the bottom.  That way folks in a hurry don't have to scroll through too much to get where they're going.  Let me know if you hate it this way.


Spring Martini

Total time:  5 minutes, not counting time to chill serving glass or make simple syrup.
Credits:  Hendrick's & St. Germain are a fairly popular combination, as seen here and here (just as examples).  The idea of adding fruit came from a delightful mixed drink called a cherub's cup that features Hendrick's, St. Germain, strawberries, and pink champagne.


Ingredients:

  • 3 fresh raspberries (can sub: 2 small fresh strawberries)
  • 3 fresh mint leaves (can sub: 3 fresh basil leaves)
  • 2 small sprigs cilantro (optional, can omit)
  • 1 oz. (= 2 TBS) simple syrup
    • note: simple syrup made with palm sugar is especially good in this, though on the sweet side
  • 1 oz (= 2 TBS) St. Germain elderflower liqueur
  • 2 oz (= 0.25 cup) Hendrick's gin
  • 1 slice cucumber for garnish
  • you will also need:  ice, pestle or spoon, shaker or sturdy cup, fine-mesh sieve, cold serving glass

Directions:


  1. Muddle berries and herbs with simple syrup at the bottom of your shaker.
  2. Add St. Germain and Hendrick's.
  3. Add ice and place top securely on shaker.
  4. Shake well over ice (1-2 minutes).
  5. Strain into cold serving glass.
  6. Garnish with cucumber (or an extra raspberry wrapped in mint, if desired).

Note:  For a weaker drink, top with seltzer and serve over ice.
......

Okay, now we can get into the details for anyone who wants them.

First you'll want to gather up your ingredients.  Don't worry if cilantro's not your thing.  It's pretty polarizing and I understand if you'd prefer to omit it.


You might wonder why I specified Hendrick's.  If you haven't tried it, go for it.  Unlike most gins Hendrick's is best complimented by cucumber rather than lime.  It's herby and flowery compared to other gins.  I think that makes it a good choice for spring drinks.  It also goes superbly with St. Germain, which is an elderflower liqueur.  (Trivia:  liquors are stronger and are typically made from grains and starches, whereas liqueurs are weaker, sweeter, and often made from flowers and fruits.  Neat, huh?)

Don't worry if you don't have to use a fancy bar shaker for this.  In fact, I've lost the top half of my shaker since I use it maybe once every two years.  To be completely honest, when I was playing around with flavors and proportions (in very, very small batches, mind you) I just used a plastic cup that I knew would be able to handle a little abuse.  Delicate glasses aren't recommended for muddling or shaking because they could break.  There's no shame in using plastic cups here, is my point, so don't think you have to get fancy.

Put your berries and herbs into the bottom of your shaker (or plastic cup):


And add in 1 oz. of simple syrup.  If you make mixed drinks frequently enough that you already know what that means, feel free to jump ahead.  For everyone else:  drink recipes are often expressed in ounces (measured with a special hourglass-shaped cup called a "jigger") rather than spoons or cups.  Happily, though, 1 oz. is also equal to 2 tablespoons.  So you're not out of luck if you don't have a jigger.

Simple syrup is just that:  the simplest kind of syrup you can make.  It's 1:1 sugar & water.  You can buy it most places that sell mixing supplies, but it's also very easy to make at home, as seen here or here.  Boil the water, add the sugar, dissolve it, and let it cool.  I used simple syrup that I made with palm sugar just because I like a little extra sweetness.  Use whatever you've got, no need to get fancy-pantsy.  The only reason I mention it in case you were inclined to panic about why I'm using brown simple syrup when normally it's clear.


Okay, so the herbs, berries, and sugar water are in your durable cup.  Next you're going to want to crush all these things together into a kind of mess.  Not a puree, a mess.  This is called muddling (as in, "today I feel all muddled").


Neatness is not the point.  The point is to crush up your herbs & fruits, thereby infusing the sugar water with their flavors.  Takes about a minute or so.  You can use anything you like for this: a pestle (as seen above), the back of a spoon, a potato masher... whatever.  Just squish things around for a while.


See?  Messy.

Order doesn't really matter, but either way you need to add in 1 oz. (or 2 tablespoons, if you prefer to think of it that way) of the St. Germain:


And 2 ounces of gin.  Two ounces is equal to four tablespoons or, because measurements are funky this way, one quarter-cup.


You'll now have a liquidy mess:


Which, if you didn't mind your martinis chewy, you could drink.  Stay tuned, though, we're going to make it much more presentable.

Pro tip:  the trick to a great martini is to get it very, very cold.  This is why our man James Bond knows the best martinis are shaken, not stirred.  Specifically, they are shaken over ice to cool them more rapidly and completely.  Never trust a bartender who just pours liquor into a martini glass and stirs it, my friends.

In order to do that, we first need to add ice to the cup (just a small handful of cubes will do):


And then you need to put a top on it.  If you're using a bar shaker, you can use the top that came with it.  If you've either lost the top or are using a cup, place another, smaller cup on top.  The top cup has to be small enough to fit inside the mixing cup, but large enough to prevent spills.  Ideally you'd use another plastic cup here, though I've done what many bartenders in a hurry do, which is to use a pint glass.  Beware:  this isn't the best idea.  I've broken pint glasses this way by creating too tight a seal or shaking too hard.  Personally I'd rather have a loose seal and a little dribble than a stuck or shattered glass.


Always shake over the sink, guys.  That's just good sense.

A minute or two is enough to flash-chill your drink, and that's really all we're going for here other than mixing up the liquids.  And no need to hold it over your shoulder or hold it sideways like you see in the movies.  Gentle will still get the job done.

Part of serving a really great martini is to use a chilled glass.  5-10 minutes in the freezer does the trick I've found.  I just put the glass in before I gather my ingredients and by the time I've got everything shaken up it's just about set.


This next step is key.  Pour the drink through a fine-mesh strainer to serve.  Otherwise your guests will be picking raspberry seeds out of their teeth.


It really makes a big difference, as you can see:


On the left:  floss city.  On the right: a gorgeous, debris-free drink.

After that you can either drink it straight away or you can garnish it.  One way to garnish is to use a cucumber.  Cut a tiny slit just at the edge of a cucumber slice:


And very gently position it over the edge of the glass.  Either as an alternative or as an addition, you could float a little mint on top:


Or even thread a raspberry and some mint onto a swizzle stick or drink umbrella.  I showed one example here with a toothpick, since that's all I had on hand:


But that's it!  As mentioned in the quickie directions you could alternatively serve this in a highball glass with ice and a generous splash of seltzer for a weaker drink.  Totally up to you!


Saturday, March 29, 2014

Jajamen (Morioka Noodles Part One)


Is your hometown famous for anything?

If I were hard-pressed to pick a few things that locals consider famous about my hometown I might come up with hot cider donuts, rubbery mini-dogs, a whole lot of very pretentious posh/artsy attractions, and of course fueling the cold war back when General Electric (later General Dynamics) was heavily involved in building bombs.  Not every hometown story can be a proud one, I guess.

When I first started taking Japanese lessons I remember being stumped by the question of what my hometown was famous for.  It wasn't something many of us in the class had ever given much thought to.   Certainly I didn't have a ready answer for it.  "What's my hometown famous for?  I don't know... people trying to leave it, I guess?"

But in Japan that's a question that nearly everyone has an answer for.  I can tell you, without really stopping to think, what many of the towns near my old home are famous for.  My village, for example, is known for wine and a type of traditional dance called kagura.  Tono, the next village over, is famous for being the Japanese equivalent "a kingdom far, far away," wasabi beer that locals love to give to unsuspecting visitors as a joke, and its particularly delicious horses (yes, you read that correctly and yes, they were rather delicious).  Less unsettlingly, the prefectural capital is known for things like the Sansa Odori festival, cast-iron teapots, and the Three Great Noodles of Morioka.

It's also famous for crackers.  

Of the Three Great Noodles, two are fusion dishes.  Jajamen, this week's recipe, is a Japanese version of zha jiang mian / jajangmyeon (Chinese and Korean noodle dishes, respectively).  Morioka reimen, which I'll post in a few months once the weather heats up, is a version of a Korean cold noodle dish called naengmyeon.  The third type, wanko soba, isn't a specialty recipe so much as it is a unique kind of eating/politeness contest where the object is to slurp down your tiny bowl of noodles and put the lid on your bowl before the waitress who's hanging over your shoulder can refill it.  It really doesn't get more Truly Japanese than wanko soba and if you're ever in that part of the world I highly recommend it as a bit of hysterical fun (and a way to appreciate just how much people can eat when pride is on the line).

What I like about this recipe is that it's quick and fairly straightforward to put together, and that customizing it to your own tastes is very much a part of The Way It's Done. 


Jajamen (Spicy Black Bean & Garlic Noodles from Morioka)

Total time to make:  About 15-40 minutes, depending on your multi-tasking skills.
Weirdest ingredient:  Black bean sauce, used as a replacement for 甜麵醬 ("tianmianjiang"), a Chinese flavoring made from red miso paste.  Happily, black bean sauce is fairly easy to find in the pan-Asian/international section of many grocery stores, even here in a low-diversity area like rural PA.  Alternatively, if you have red miso paste on hand you could make your own tianmianjiang for a more authentic flavor.


Credits:  The recipe below leans rather heavily on this Cookpad recipe (in Japanese), with input from this one (also in Japanese), and English-language Japanese and Korean versions of the dish.
Makes:  2-3 servings.  


As a heads-up, Jajamen is a recipe in two parts.  Unlike other multi-step recipes, you have to eat the first part before you can make the second.  That's part of the fun.  Stay tuned and you'll see what I mean below.  Also, if you see pork in the recipe and are tempted to give up (I myself eat pork maybe 1-2 times a year at most -- to be honest it kind of grosses me out), know that this recipe would also be really excellent with eggplant (particularly Chinese eggplant), extra-firm tofu, or even black beans as a substitute.  

Before you get started with the stir-fry bit, put on a pot of water to boil in a pan big enough to cook your noodles.  In a separate pan, put on 2 cups of chicken or vegetable stock to boil as well (note: it's a-ok to use bullion here if you prefer).  You'll also want to pull one egg per person out of the fridge and put it on the counter to warm up a little.  

Okay, so the first step in making the sauce is to saute up a generous handful of mushrooms.  Use whatever kind you have on hand, I say.  I had shitake, but you're not going to feel left out if you use something else.  For this recipe I'd say about 1 tsp vegetable oil and 1/4 tsp of sesame oil is a nice combo to use in a skillet on medium-high heat:


While the mushrooms cook (about 3-5 minutes, just enough to soften up), you can dice up two pork chops into very small pieces.  Alternatively, use ground pork or veggies such as the ones suggested above.  I used pork chops because they were on sale:


Once the mushrooms are softened, the pork goes into the skillet as well.  Depending on how small your pieces are the meat will take anywhere from 5 to 15 minutes to cook all the way through.

Put together the sauce while the pork is cooking.  Gather the following up in a bowl:  2 tablespoons of miso paste (either red or white), 1 teaspoon each of ginger paste and garlic paste, 1 teaspoon sugar, 1 tablespoon of rice wine (cooking sake), 1 tablespoon of soy sauce, 1 tablespoon of mirin (or else add an extra tablespoon of rice wine and two teaspoons of sugar), and 1 tablespoon of the black bean sauce:


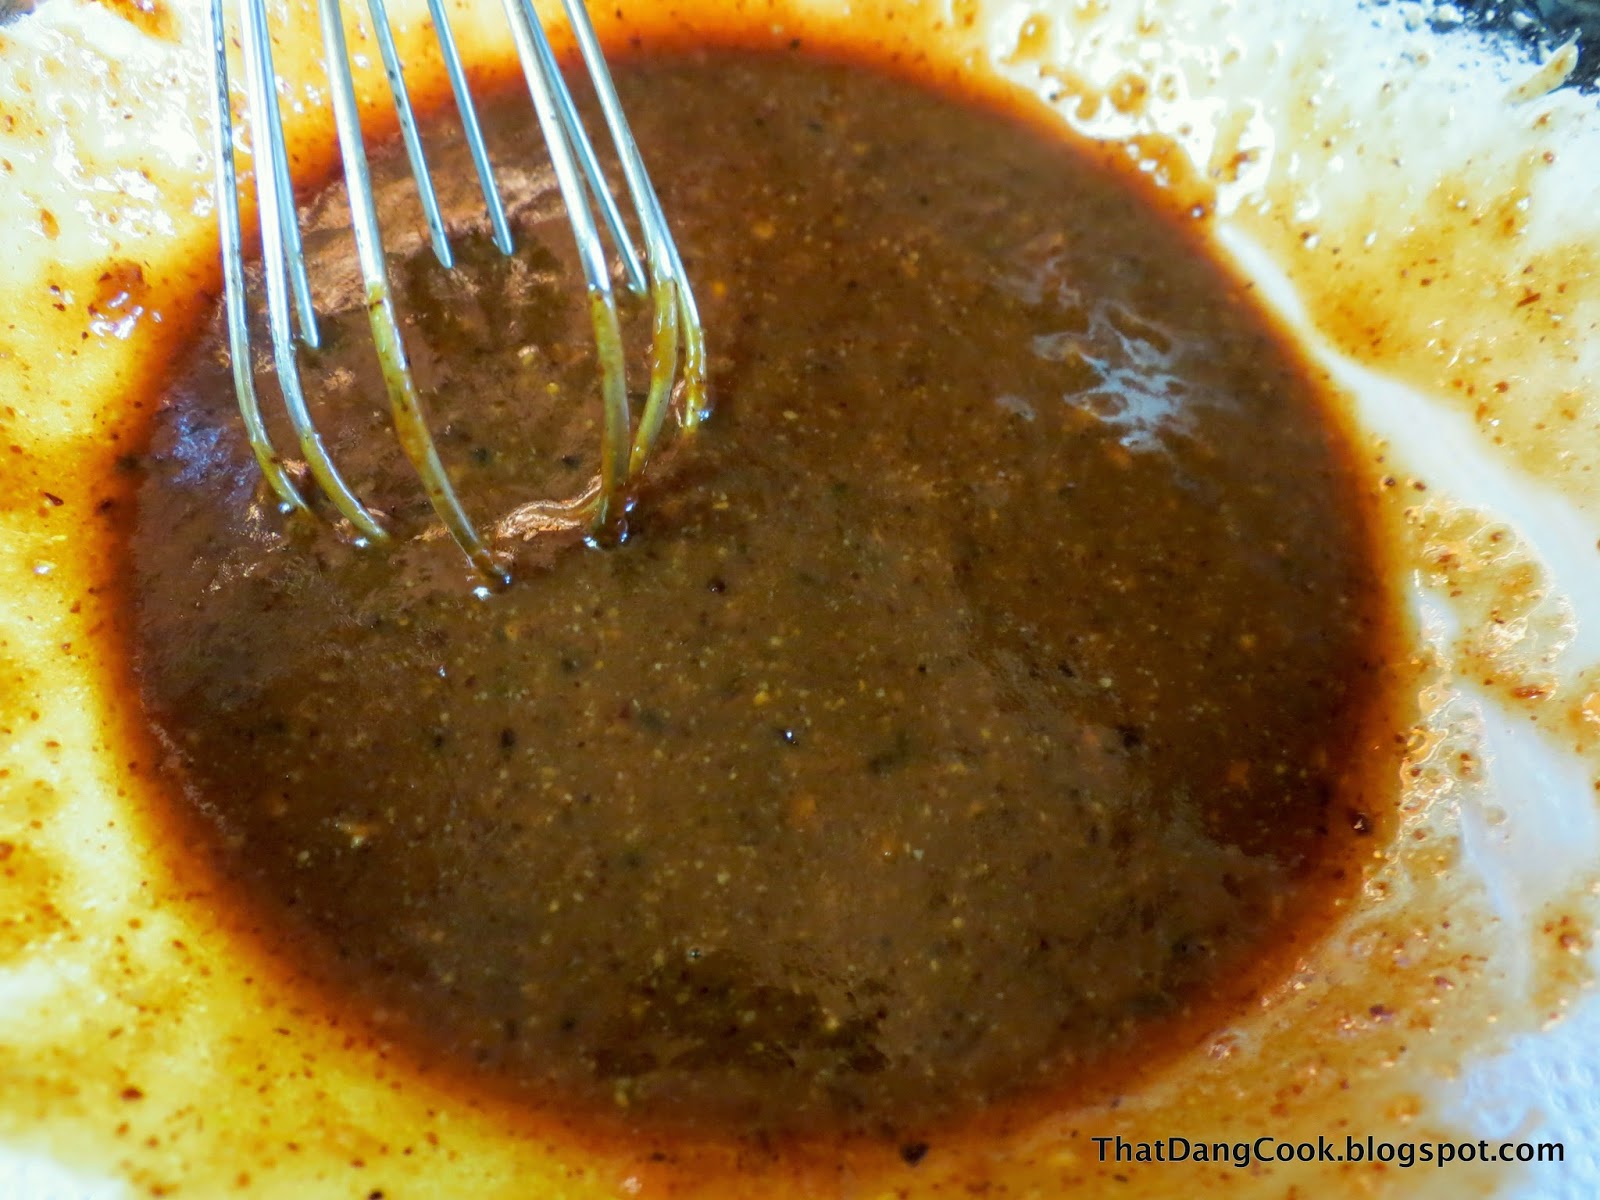
Whisk all that together into a smooth sauce:


And when your pork is completely cooked through add the sauce to the skillet:


Turn the heat down to low at this point, cover it, and let it simmer for at least another 5 minutes to let the sauce soak in.


While the sauce is simmering, slice up some cabbage (optional) and thin cucumber slices.  

When the veggies are cut, drop 2-3 servings of noodles into the boiling water you prepared before you got started with the stir-frying.  Does it matter what kind of noodles you use?  Yes and no.  I've seen udon, soba, Chinese noodles, and even ramen (minus the spice packet) used for this dish.  I say go with whatever you like best.  I used udon.  Follow whatever directions come on your noodle package in terms of boiling time, then drain the noodles and rinse them briefly with cold water to prevent them from over-cooking.


Now we get to the arranging part.  Noodles go in the bowl first:


Followed by the cabbage and cukes:


And then the sauce.  


Now, if you're going for complete jajamen authenticity then you may want to puree the sauce so that it more closely resembles a thick paste than a stir-fry.  That is totally up to you.  I have this weird pet peeve where I hate washing my blender so I didn't puree the sauce, though it did change the texture and feel of the dish somewhat to skip that step.  If you do puree the sauce then just be sure to let it cool a bit before sticking it in your blender to avoid damaging anything.  A tiny bit of broth or sesame oil can help if it's too sticky to blend properly.

When eating jajamen in restaurants it's very common to get a wide array of condiments to mix with it, such as extra garlic, La-Yu (chili oil), chili paste, scallions, and even vinegar.  I myself love a deep spicy kick to my noodles, so I opted for a dash of sriracha:


Tadaa!  Dig in!

"But wait," you say with concern and dismay.  "What about the egg and the chicken broth from back at the very beginning?"  

I'm so glad you asked.  Eating the noodles is the first course of the meal.  You can choose to completely empty your bowl, leaving only the leftover sauce  or -- my preference -- leave about 1/4 of the noodles in the bowl:


At which point you crack the egg into the bowl (really!):


And immediately top it with the boiling chicken or vegetable stock you've had sitting on the stove.  Use your spoon or chopsticks to whisk everything around for a minute or two, thereby tempering the egg and making an impromptu egg-drop soup.  


Note: if the idea of cooking the egg in this way weirds you out too much, or if you want to leave no doubt that your egg is totally cooked through, crack the egg(s) into the boiling stock on the stove, whisk, and let them cook for 2-3 minutes that way.  The only real difference is that you'll end up with chunkier egg pieces rather than a rich, eggy broth.  That said, whether you add the egg to the soup or the soup to the egg it'll still cook through and will be delicious.  I promise.  But I do totally understand the queasiness some folks might feel about putting a raw egg into their bowl, so no judgment here if you choose to do it the other way.


So now you get to have soup as a second course!  Yum!  

This is a really great dish to warm you up on chilly day, especially around this time of year when winter hasn't quite given up its hold yet.


Jajamen (Morioka Miso-Garlic Udon)

Ingredients:
  • water for boiling noodles
  • 2 cups chicken or vegetable stock (from scratch, can, or bullion)
  • 2-3 servings of udon, soba, or Chinese noodles
  • one egg per person
  • 1 tsp vegetable oil + 1/4 tsp sesame oil
  • generous handful of mushrooms
    • note: for a more Chinese/Korean feel to the dish, other vegetables (e.g. zucchini) can be used in addition to or in place of the mushrooms
  • 2 pork chops, finely minced
    • can sub ground pork, diced eggplant, cubed extra-firm tofu, black beans
  • 2 tablespoons of miso paste (either red or white)
  • 1 teaspoon each of ginger paste and garlic paste
  • 1 teaspoon sugar
  • 1 tablespoon of rice wine (cooking sake)
  • 1 tablespoon of soy sauce
  • 1 tablespoon of mirin 
    • can sub an extra tablespoon of rice wine and an extra two teaspoons of sugar
  • 1 tablespoon of black bean sauce or sweet bean paste
    • see long-version of the recipe, above, for notes
  • small handful each of shredded cabbage (optional) and thinly-sliced cucumber
  • condiments according to preference, common options include:
    • scallions
    • La-Yu sesame chili oil
    • rice vinegar
    • garlic
Directions:
  1. In separate pans, put the water for the noodles and the stock on high heat.  Let these come to a boil while completing steps 2 - 8.
  2. Add the oils to a skillet on medium-high heat.  When the oil is hot, add the mushrooms and cook for 3-5 minutes or until softened.
  3. While the mushrooms cook, dice the pork.
  4. Add the pork to the skillet, stirring occasionally, and cook through (5-15 minutes, depending on size of the pork pieces).
  5. While the pork cooks, whisk together the miso, ginger, garlic, sugar, sake, soy sauce, mirin, and black bean sauce and set aside.
  6. When the pork is cooked through, add the sauce and reduce the heat to low.  Cover and allow to cook for a minimum of 5 additional minutes.
  7. (OPTIONAL:  Allow the stir-fry to cool until lukewarm and puree in a blender or food processor to make a thick paste.  If desired, return the paste to the stove and re-heat.  This step is not shown above although it makes a more authentic-looking end product.)
  8. While the sauce is simmering, slice the cabbage and cucumbers into small pieces.
  9. While the sauce is simmering, add the noodles to the boiling water prepared in step 1 above and cook for the amount of time indicated on the package.
  10. When noodles are done, drain & rinse briefly with cold water.
  11. To serve the noodle course:  layer the noodles, cabbage & cucumbers, and sauce in an individual-sized bowl.  Top with any condiments as desired.
  12. To serve the soup course:  Leave approximately 1/4 of the noodle course in the bowl.  To this add one egg and top with the boiling stock that you prepared in step 1.  Whisk using chopsticks or spoon for 1-2 minutes or until egg is cooked in the broth.  
  13. (Alternatively, drop the egg(s) into the broth while it is boiling on the stove and allow 2-3 minutes to cook through before adding to the bowl.)


Wednesday, December 4, 2013

Cucumber Parfait: What is "Raita" and Why Do I Care?

It took a long time for me to learn to read south Asian recipes.  Sometimes the author would use words I wasn't used to and I'd be second-guessing myself, like "curd" instead of "yogurt."  Other times they'd use words interchangeably, leaving me flounderingly unaware that cilantro and coriander are the same thing (they totally are, trust me).  Now and then I'd even avoid a recipe altogether because of the ironic and ubiquitous "chilly powder" error that plagues countless recipes and products.

(Cue Inigo Montoya here.)

Raita is a cucumber side dish.  Remember the tzatziki craze a few years back, when everything under the sun was covered in yogurt & dill and stuffed into a pita?  Raita is in more or less the same family.  At its heart raita is diced cucumbers in cilantro- and mint-flavored yogurt.  The rest is up to you.

If I can globe hop for just a minute, something I have learned is that in Japanese cooking there is a lot of emphasis on variety: a mixture of different colors, textures, and flavors should be present at every meal in order to help both tongue and eyeballs feel satiated (seriously).  One of the ways they accomplish this is through having pickled side dishes - just a few bites is enough sour or bitterness to round out the meal, plus it often adds a bit of crunch.  Sounds crazy, but it works.  In my mind raita is in the same vein.  It's a slightly sour, slightly crunchy side dish to help satisfy your taste buds and your brain.

Here's the neat bonus feature of raita: it helps to cool your mouth down after spicy foods in two different ways.  Ever heard the old wives' tale that you should drink milk after eating spicy food?  One theory goes (and forgive me, I can't verify if this is true or not so I fully invite a more informed opinion to chime in here) that the nervous system's reaction to capsaicin - the chemical in the chili pepper that makes your insides scream in burny agony - is partly blocked by the proteins in dairy.  So that's one way.  The other way is that yogurt, mint, and cucumber have a psychological cooling effect on the tongue, helping you to feel cooler even if you aren't actually cooler.

We've all tried too hard now and then.


I'm going to share with you my own makeshift recipe for raita.  I'll offer some suggestions for ways to change or improve upon it, but in the end it comes down to what makes you happy.  Think of it like a cucumber parfait: the yogurt and cucumber are the key players, the rest is up to your imagination and your tastes.


Raita for Beginners

I started out with around 1.25 cups of plain yogurt.  I happen to have Greek yogurt in the house at the moment, but regular yogurt obviously would work well so long as it's the plain, unflavored kind.  Don't use vanilla, it will be gross.  As you can see, yogurt straight out of the container's a little lumpy.


Thirty seconds with a whisk fixes that and makes the next few bits a lot easier.

Smoov.

To the yogurt I added ~2 tsps of honey.  You can skip the honey altogether if you'd like, or add more according to your tastes.

Sweet.

Next I grabbed a small amount of fresh cilantro and fresh mint, about 2:1 in terms of volume.


If you have coriander-mint chutney (remember: cilantro and coriander are the same thing), you can use that in place of the fresh herbs.  You could probably also use dried herbs here, but I haven't experimented with that so I can't tell you how much to use.  Dried herbs are usually much more potent than fresh, so start small.

If using fresh cilantro and mint, chop them up very, very finely:
Lookin' fine.


Then add them to the yogurt.  If you want, you can also add any of the following: garlic powder, salt, onion powder, cumin powder, or other veggies like diced bell peppers or shredded carrots.  I don't use any of these, but it's nice to know your options, isn't it?  Feel free to play around and report back.

I've run out of descriptors.  


Next I diced up half a cucumber, a tomato, and 1/4 of a red onion.  The onion I chopped more finely than the cuke and tomato because I personally don't like a big bite of onion in one go.  Unlike Doc, who can eat raw onions like an apple.  (I think his taste buds are broken.)

Yum!  Dig those colors!

And that's the basic recipe!  I've also seen people put chilies, jalapeño peppers, or red chili powder in raita as well, but I skip that bit because that ruins the whole "cooling off" thing for me.  Maybe that's why so many people struggle with the chilly/chili difference...?

Brrrrrr.

So there you have it!  The ratio of yogurt to veggies isn't crucial.  None of it really is.  I wanted to get off to an easy, stress-free start.  Next up is a turkey curry, so stay tuned!

Plays well with others.